Avoid Overlaps (Topology)
Avoid Overlaps is a topology rule for polygon editing. When it is on, every polygon you draw or edit on a flagged layer is checked against the polygons already in the data the moment you finish the edit. If your shape overlaps a neighbour, Mapit offers to clip it to the shared boundary so the two features sit edge to edge with no overlap. If your shape fully encloses a neighbour, Mapit offers to cut a matching hole so both features coexist as a donut.
The geometry is computed by JTS (Java Topology Suite) on Android and GEOSwift on iOS. Both wrap the same GEOS C library, so the algorithm and the result are identical across platforms.
Avoid Overlaps is part of the Advanced Editing Pro+ feature set. Free and Pro users can see the master toggle in Settings > Advanced Editing but turning it on opens the subscription paywall.
Why this matters for cadastral and professional capture
In a cadastral dataset, a parcel boundary is shared: where one parcel ends, the next one begins. The parcel fabric should tile the area with no gaps and no overlaps. When boundaries are digitised by eye, two problems creep in:
- Slivers and overlaps - two parcels that should share an edge end up overlapping by a fraction of a metre. The overlapping strip is counted twice, so the sum of parcel areas no longer matches the block area, and legal area figures drift.
- Re-digitising shared edges - tracing the same boundary twice, by hand, never produces two identical lines.
Avoid Overlaps removes both. Instead of trying to trace an existing boundary exactly, you draw your polygon so it deliberately crosses over the neighbour, then let the topology check trim it back to the neighbour's real edge. The clipped polygon inherits the neighbour's vertices along the shared boundary, so the two features share a mathematically identical line - the foundation of a clean, gap-free, overlap-free parcel layer suitable for area calculation, registration, and downstream GIS.
Typical professional uses:
- Cadastral subdivision and infill - capture a new parcel against existing registered parcels without overlapping them.
- Enclaves and easements - cut a hole for a feature that sits entirely inside a parcel (an easement, a building footprint, an exclusion zone).
- Land cover / zoning - keep adjacent zones mutually exclusive.
- Cross-theme capture - keep parcels, buildings and zoning in separate layers but still prevent them from overlapping each other (see Cross-layer checks).
How it works
There are two outcomes, chosen automatically from the geometry:
| Situation | Prompt | Result |
|---|---|---|
| Your polygon partially overlaps a neighbour | "Clip to the shared boundary?" | The overlap is trimmed away; your polygon stops at the neighbour's edge. |
| Your polygon fully encloses a neighbour | "Cut a matching hole so both features coexist?" | A hole matching the neighbour's outline is cut, producing a donut. |
In both cases a preview is shown before anything is saved, with a legend:
- Original (red) - your shape as drawn.
- After clip / After cut (green) - the result that will be committed.
You then choose Apply to accept the topology result, or Keep overlap to commit your shape exactly as drawn (no topology applied). Nothing is written until you choose.
Only the feature you are editing is ever modified - existing neighbours are never changed.
Cross-layer checks
Avoid Overlaps is set per layer. The participating set is every polygon layer you flag with Avoid overlaps with this layer (up to 3 layers). When you edit a polygon on any flagged layer, it is clipped against the existing polygons in all flagged layers, including its own. This is how you keep, for example, parcels and buildings in separate layers but still mutually exclusive.
A flagged layer does not need to be visible on the map to take part - the check reads the stored geometry directly.
Setup
Two switches turn the feature on: a master toggle in Settings, and a per-layer flag in Edit Layer.
1. Enable the master toggle
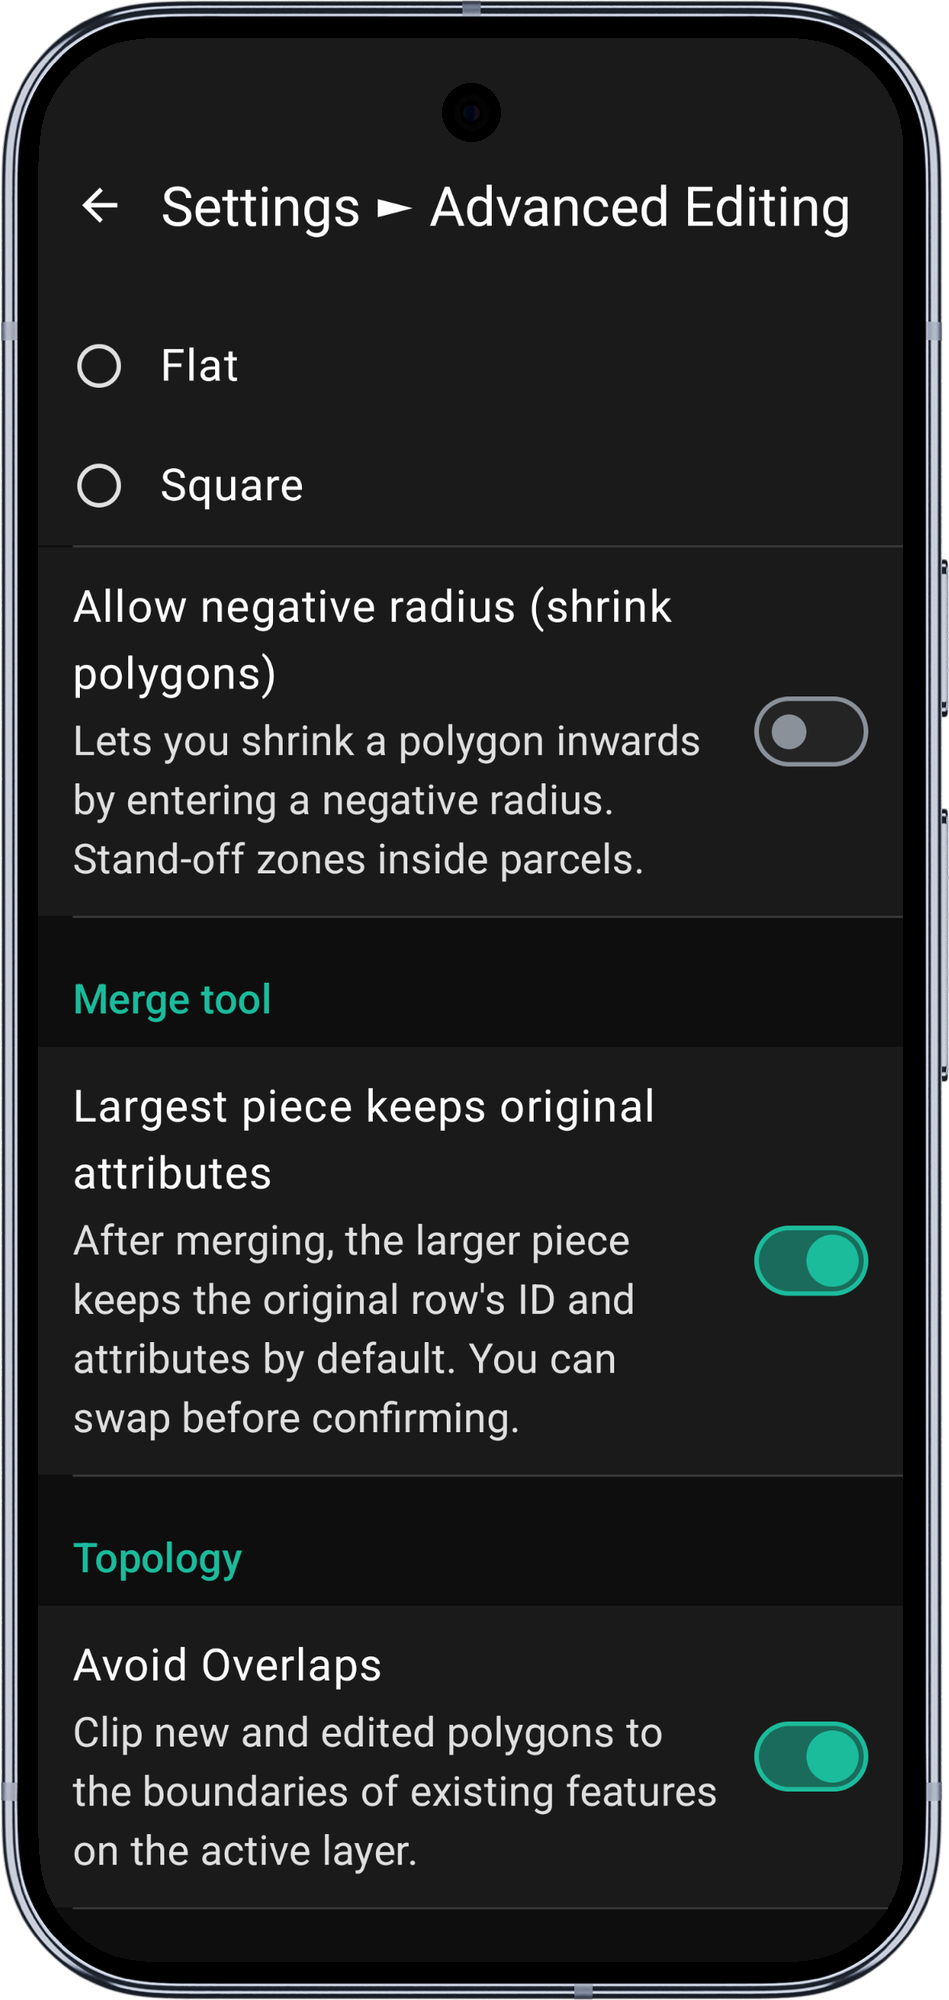
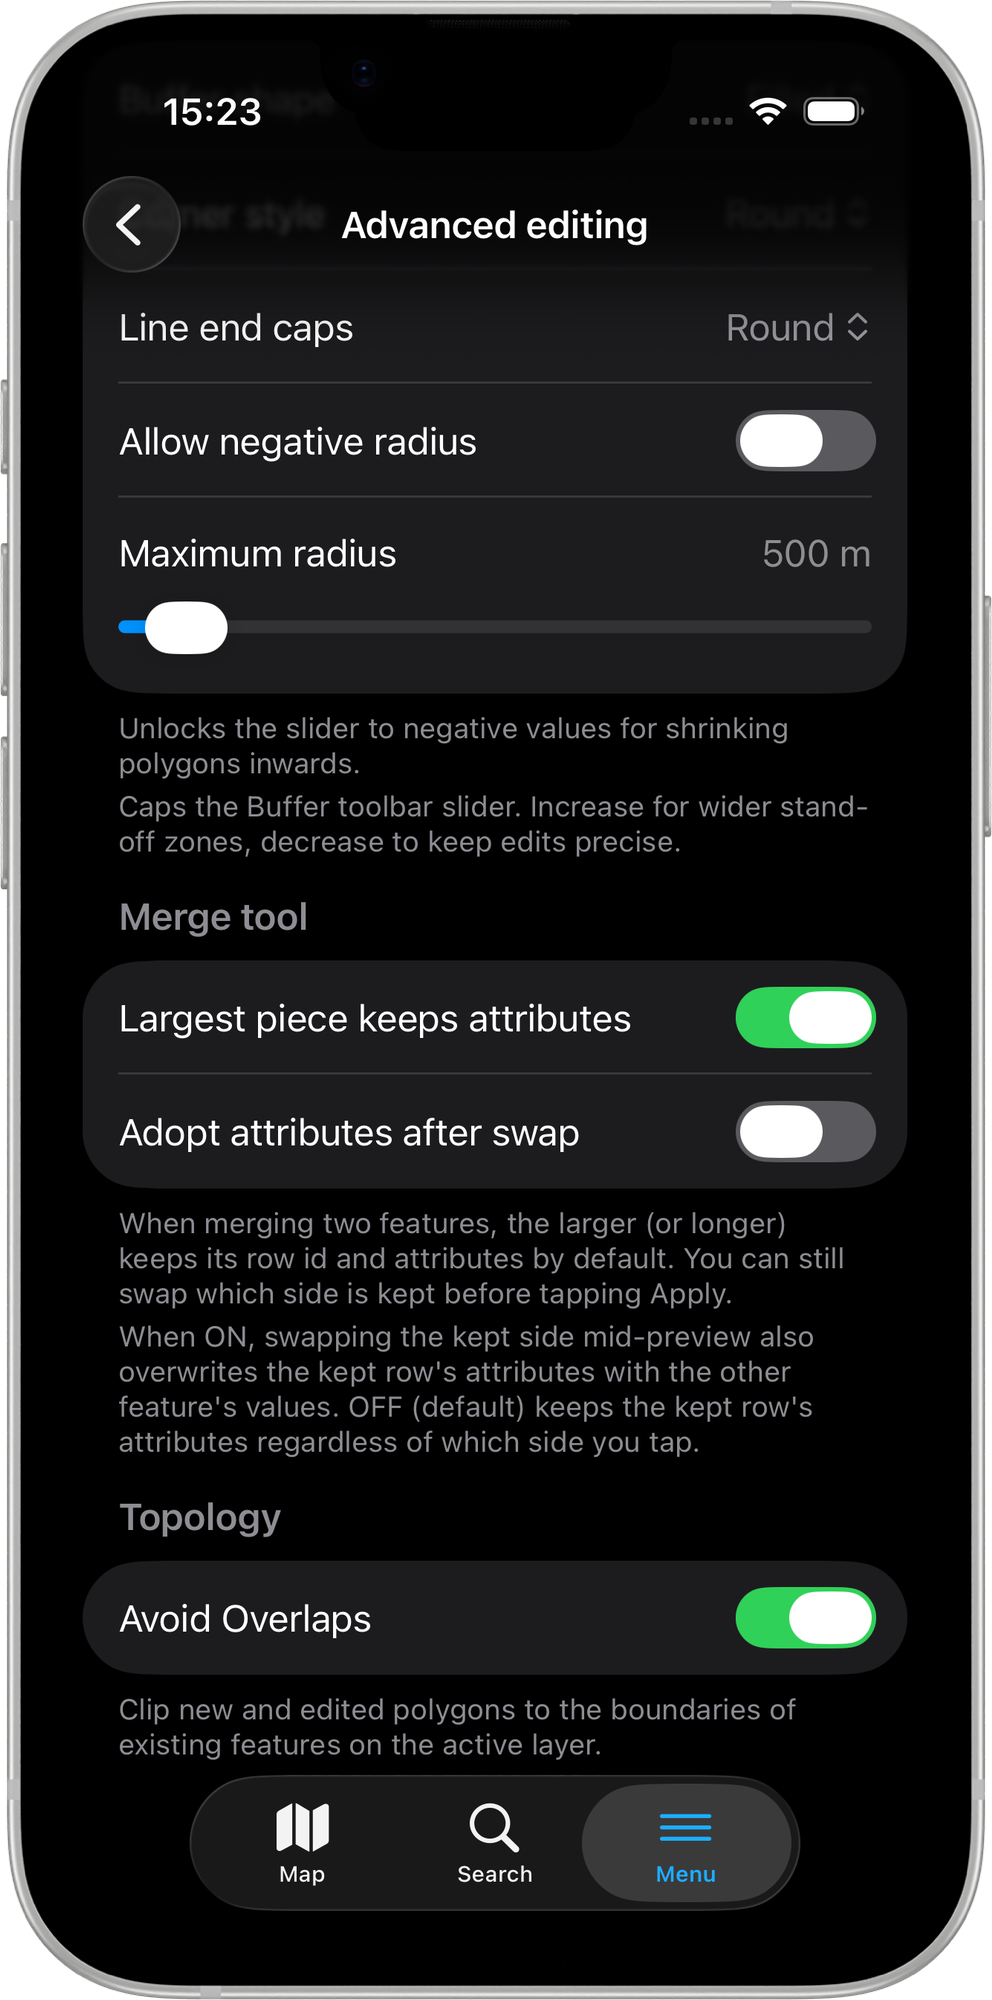
Open Settings > Advanced Editing and turn on Avoid Overlaps under the Topology heading.
- Android
- iOS
2. Flag the polygon layers
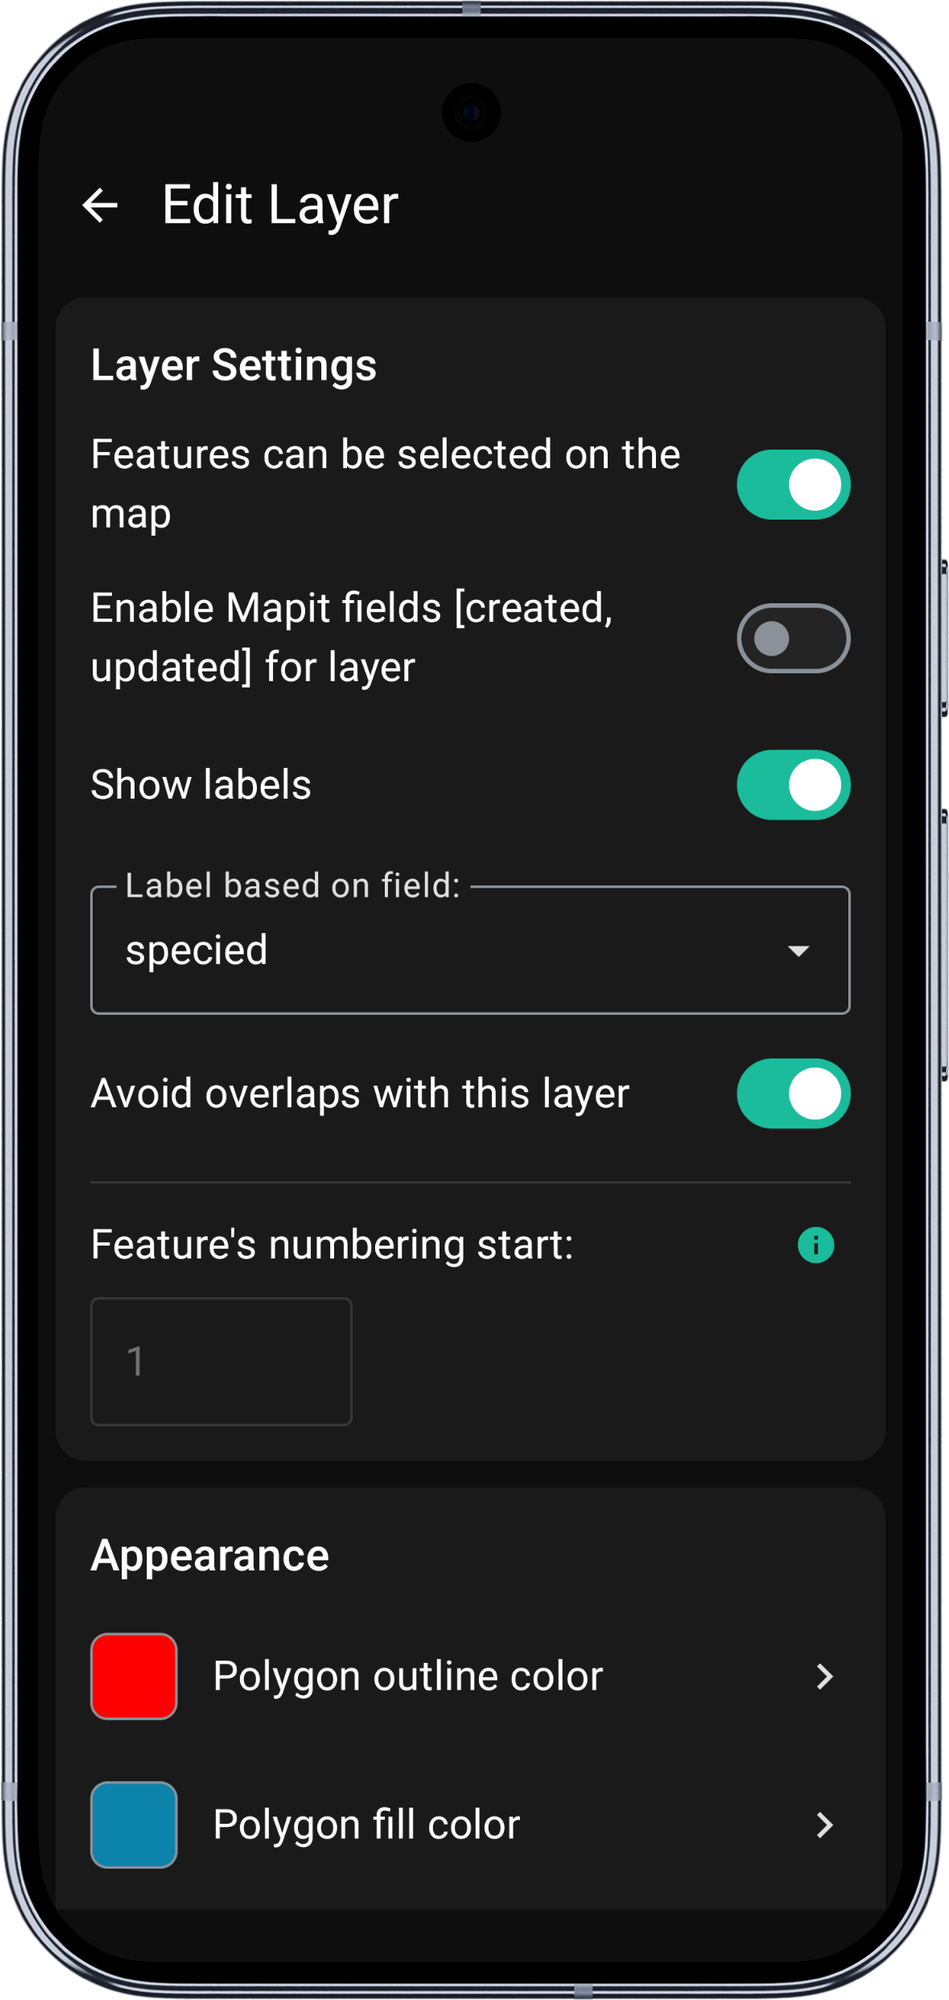
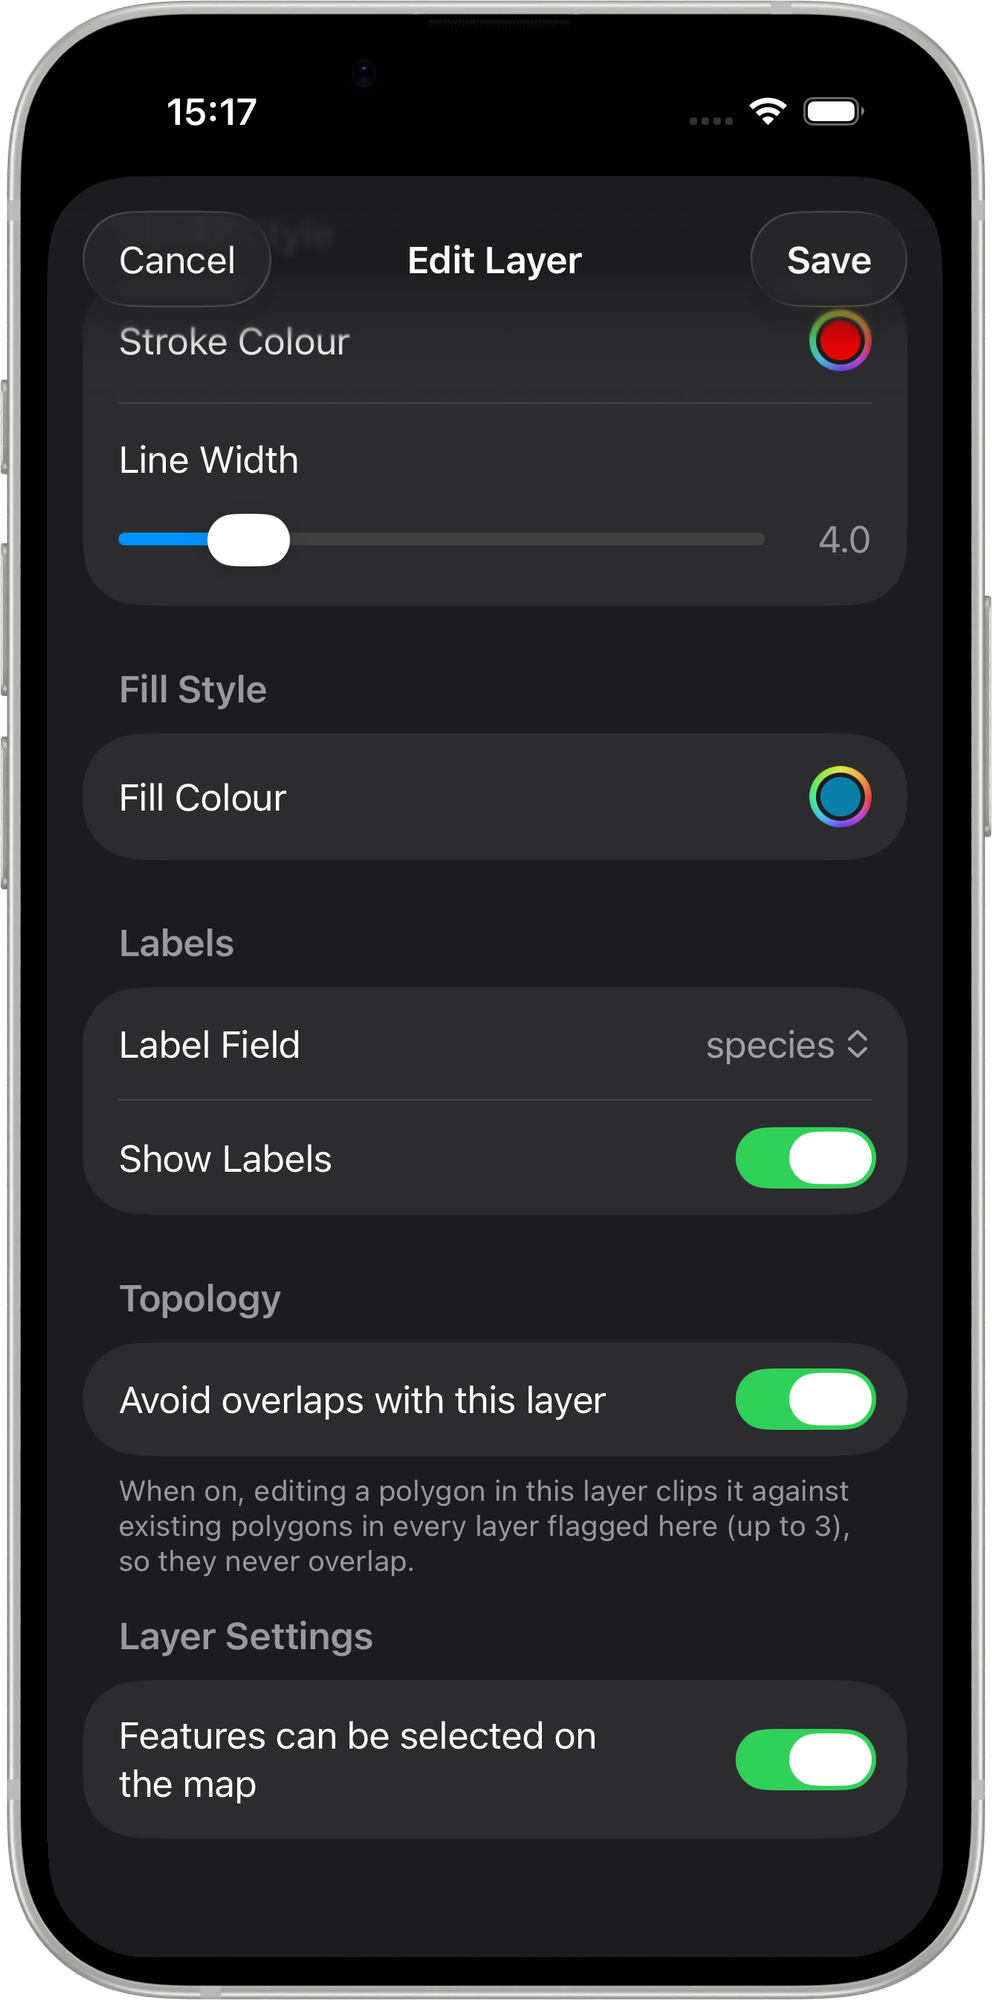
Open Edit Layer for each polygon layer that should take part and turn on Avoid overlaps with this layer. Flag up to three polygon layers; editing any of them then clips against the whole set.
- Android
- iOS
The toggle only appears for polygon layers. Lines and points are not checked.
Clip an overlapping polygon
This is the everyday case: capturing a parcel that butts up against an existing one.
- Android
- iOS
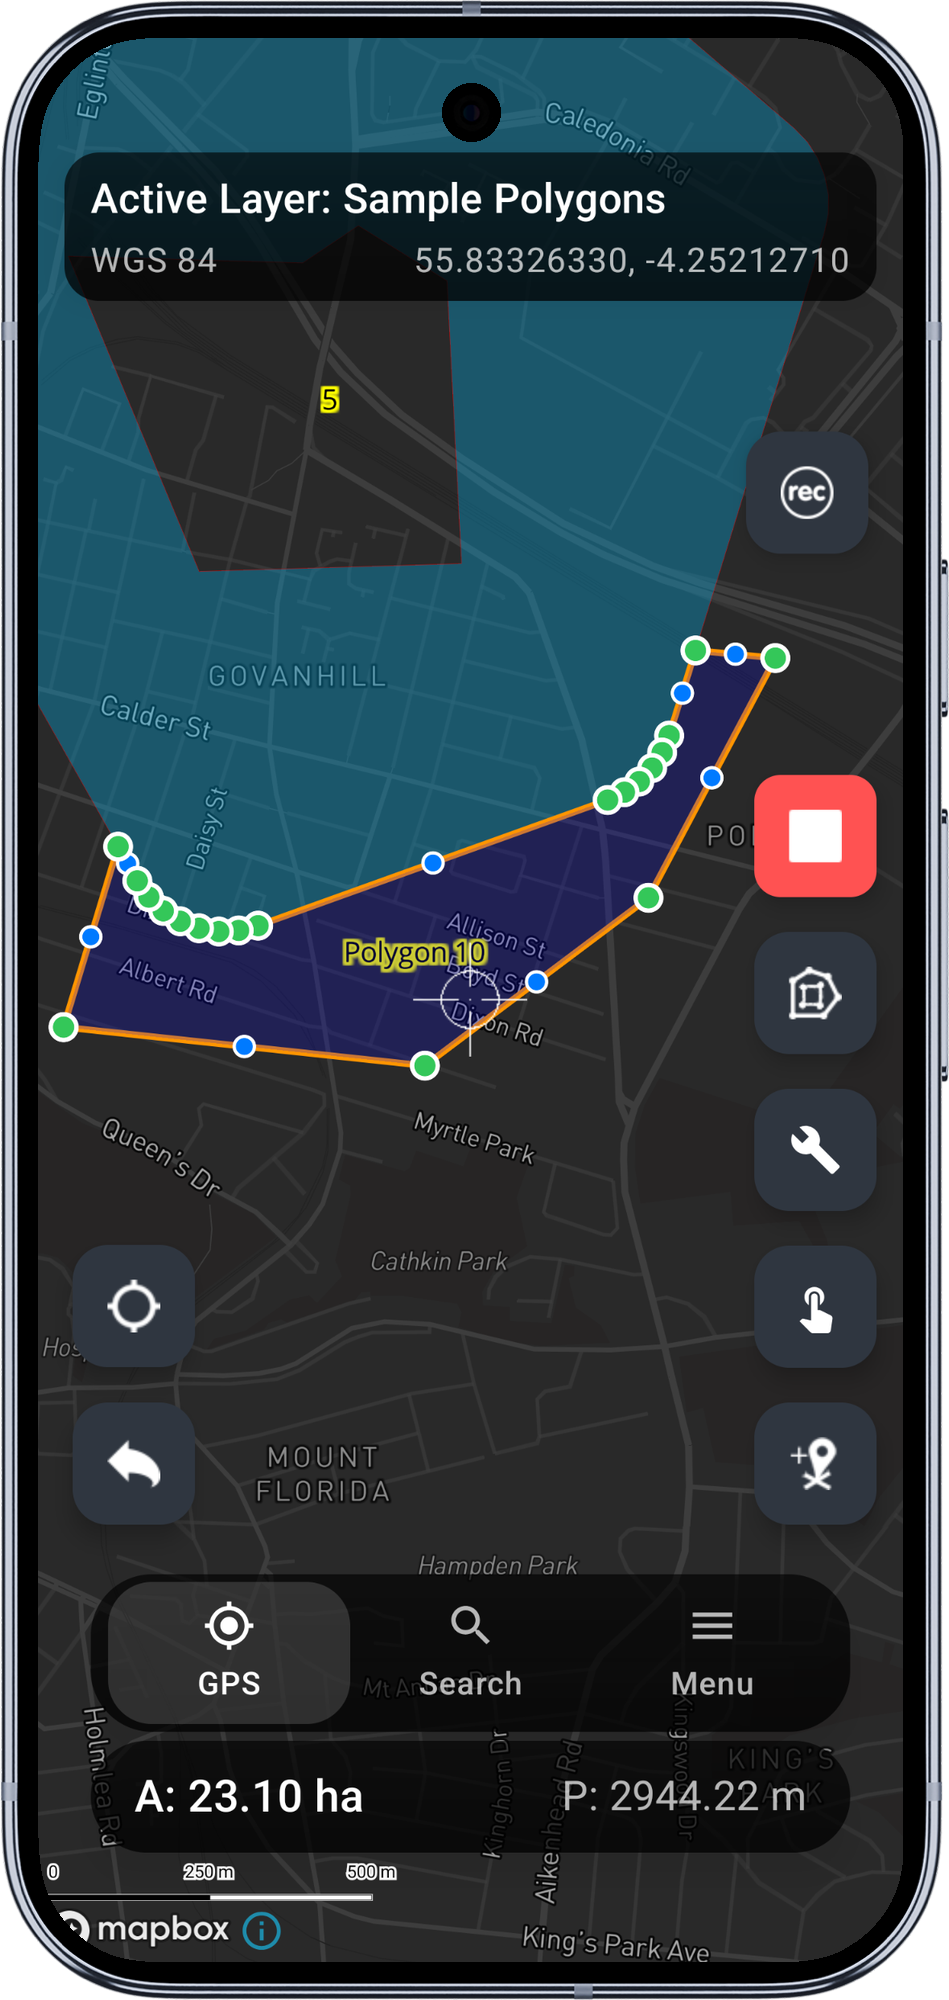
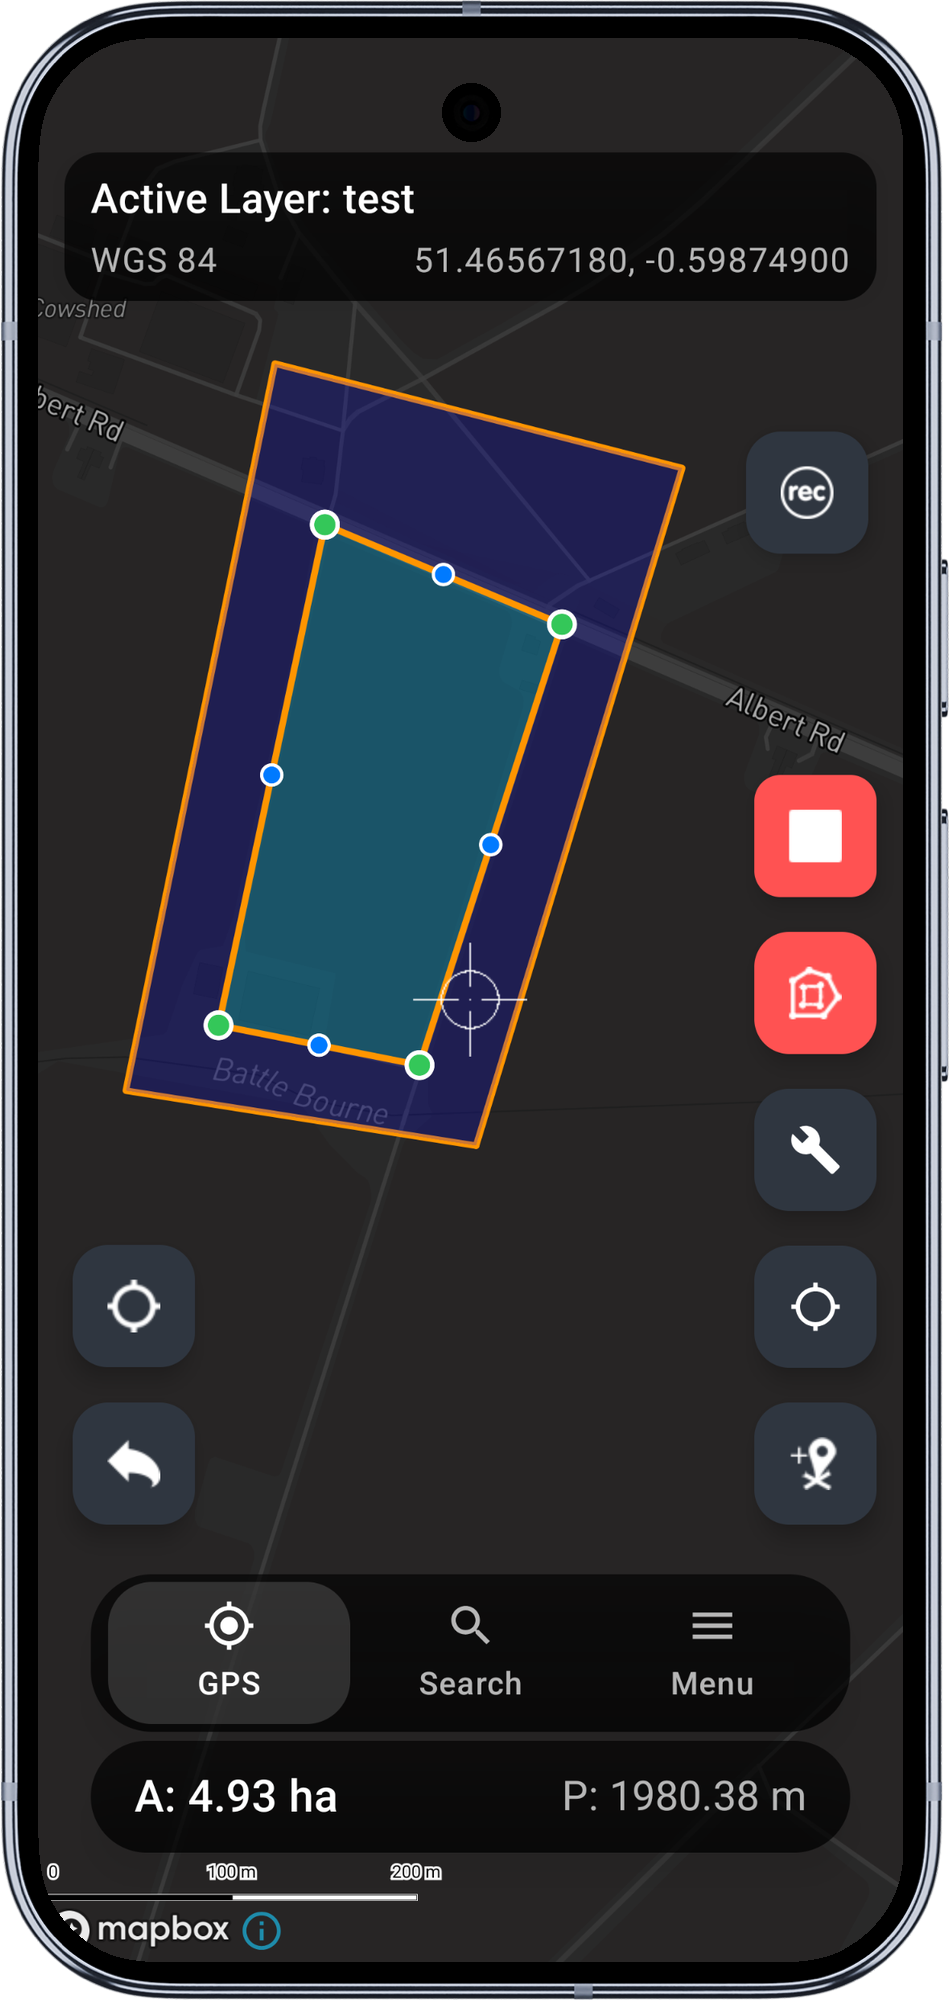
1. Draw over the neighbour
Start an edit session on the flagged layer and draw your polygon so it deliberately crosses into the neighbouring feature. Do not try to trace the shared boundary by hand - let the overlap be generous.
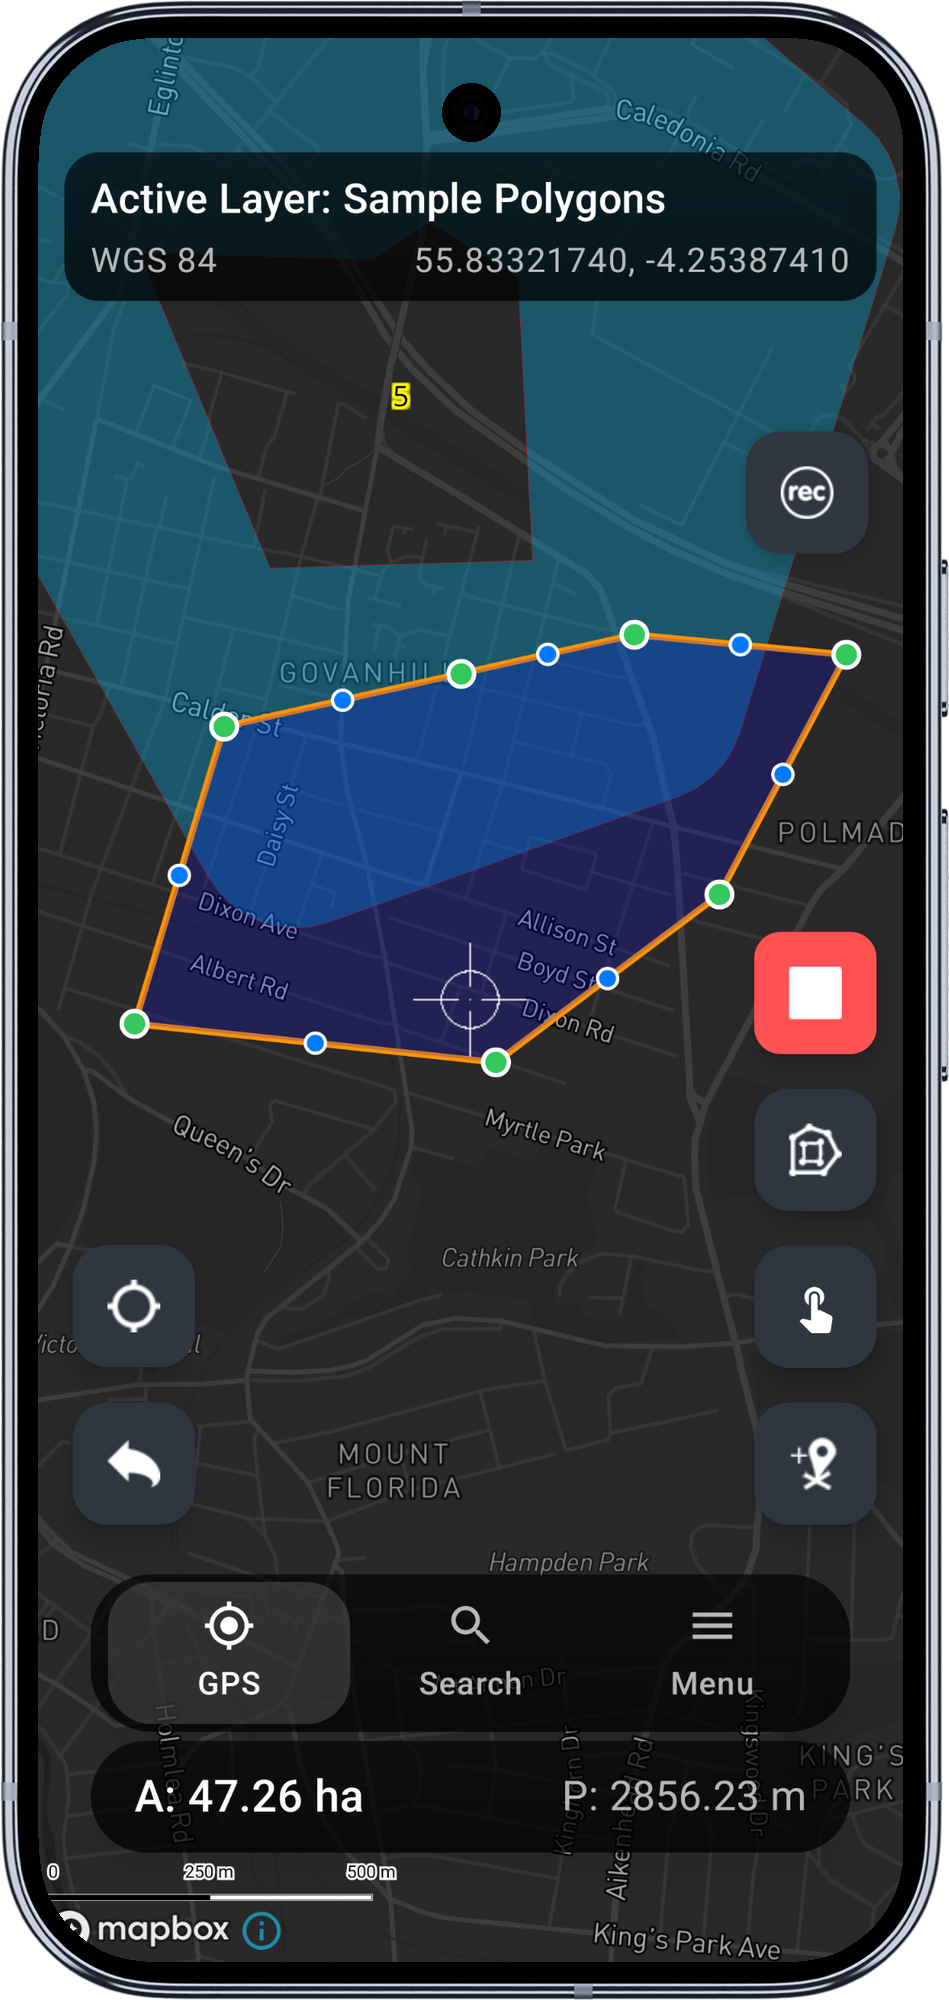
2. Finish the edit and review the prompt
When you stop the edit, the overlap check runs. An Overlap detected card slides up: This polygon overlaps 1 existing feature. Clip to the shared boundary? The map shows your original shape (red) against the clipped result (green).

3. Apply
Tap Apply to commit the clipped geometry. The saved polygon stops exactly at the neighbour's edge, and the clip inserts vertices along the shared boundary so it follows the neighbour's real outline - including detailed or curved boundaries.
1. Draw over the neighbour
Start an edit session on the flagged layer and draw your polygon so it deliberately crosses into the neighbouring feature. Do not try to trace the shared boundary by hand - let the overlap be generous.
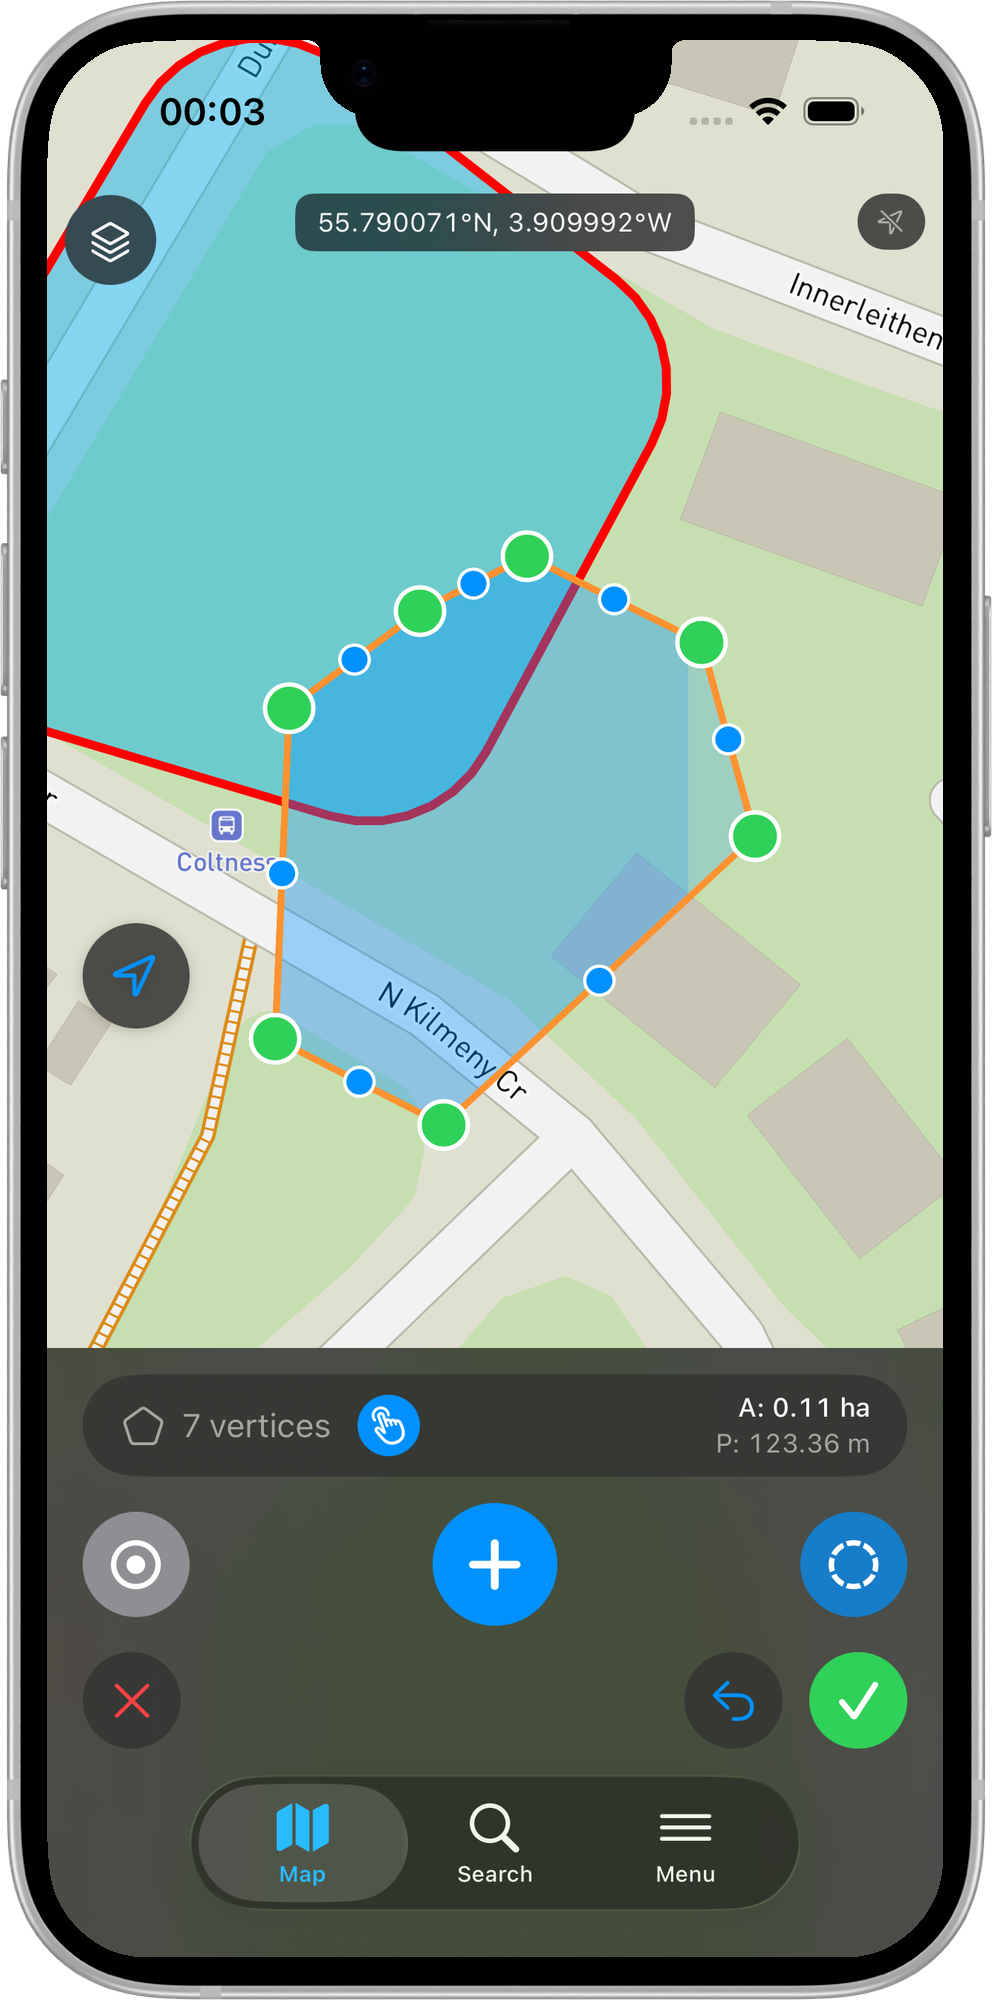
2. Finish the edit and review the prompt
When you finish the edit, the overlap check runs. An Overlap detected sheet appears: This polygon overlaps 1 existing feature. Clip to the shared boundary? The map shows your original shape (red) against the clipped result (green).

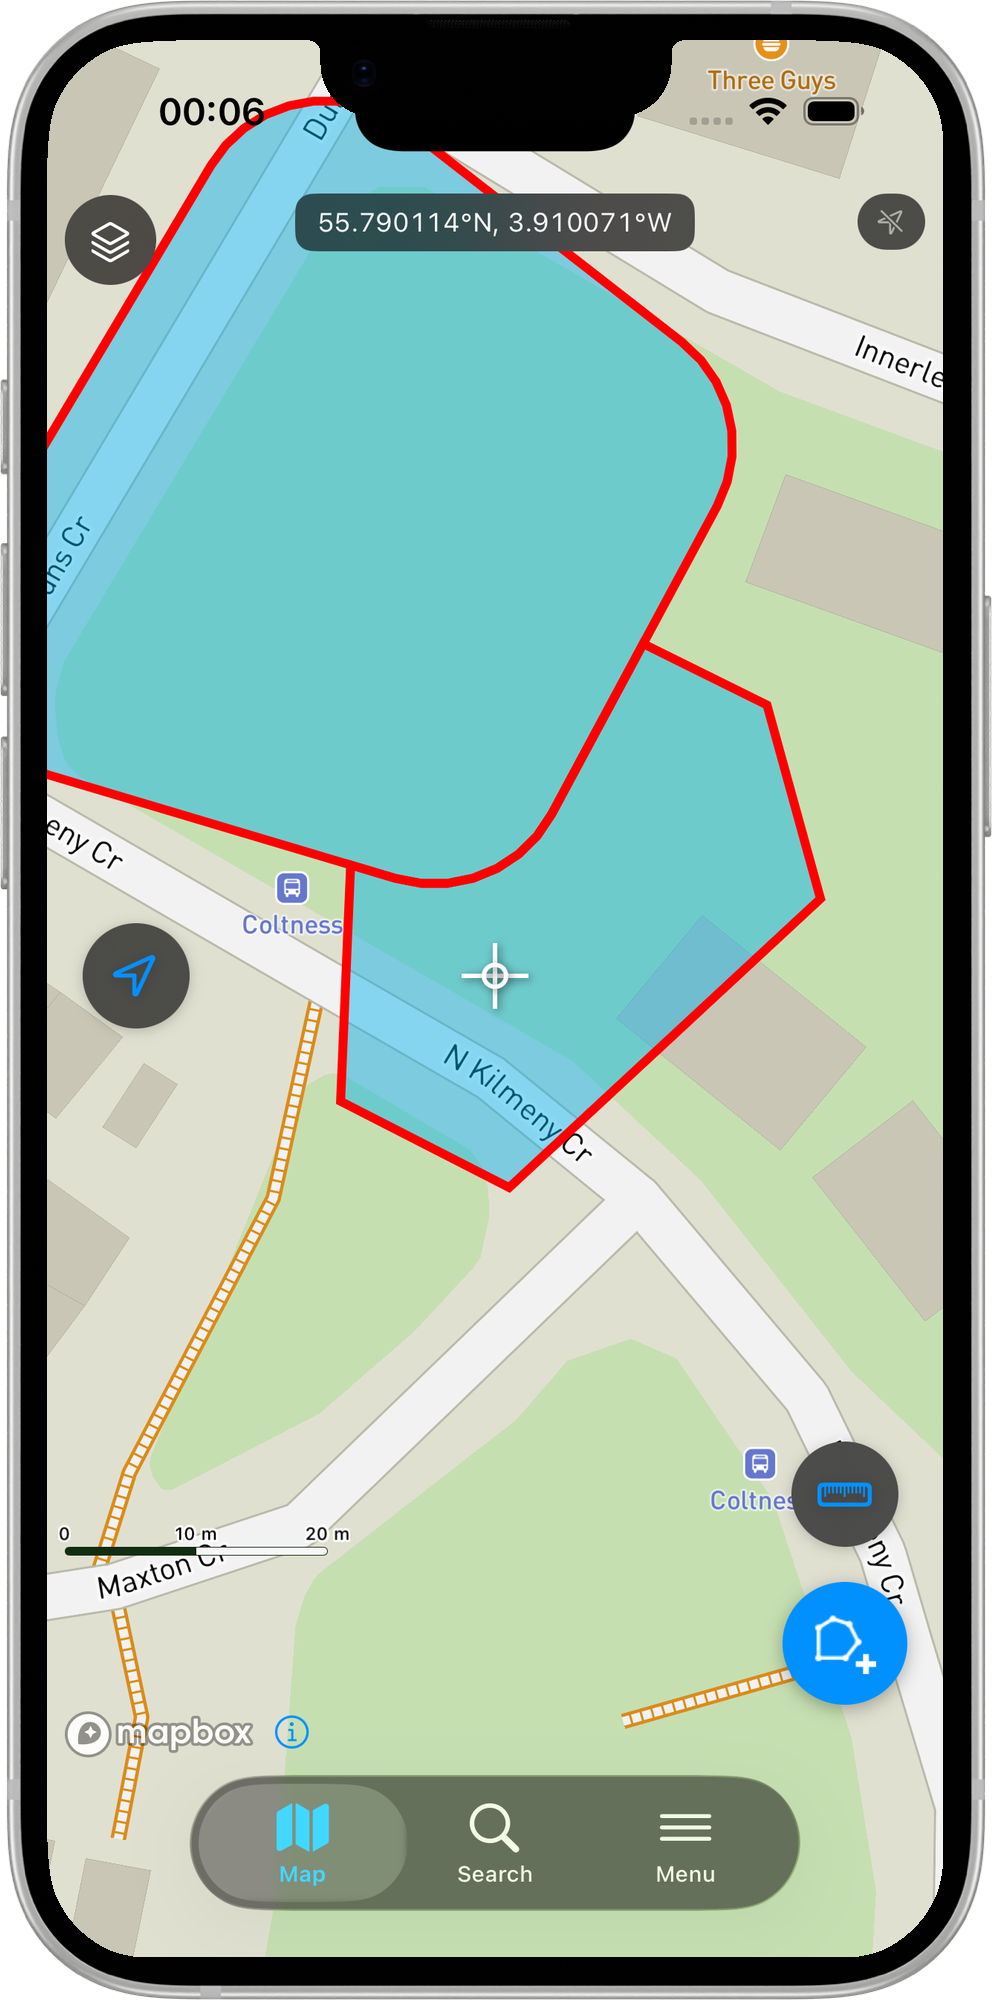
3. Apply
Tap Apply to commit the clipped geometry. The saved polygon now stops exactly at the neighbour's edge, sharing its boundary line.
Cut a hole for an enclosed feature
When your new polygon fully covers an existing one - for example a parcel that surrounds an easement or a building footprint - clipping would erase nothing useful, so Mapit offers to cut a hole instead. The result is a donut: your polygon with an interior ring matching the enclosed feature, so both coexist without overlapping.
- Android
- iOS
The Overlap detected card reads This polygon fully covers 1 existing feature. Cut a matching hole so both features coexist? The legend shows After cut (green). Tap Apply to commit the donut.
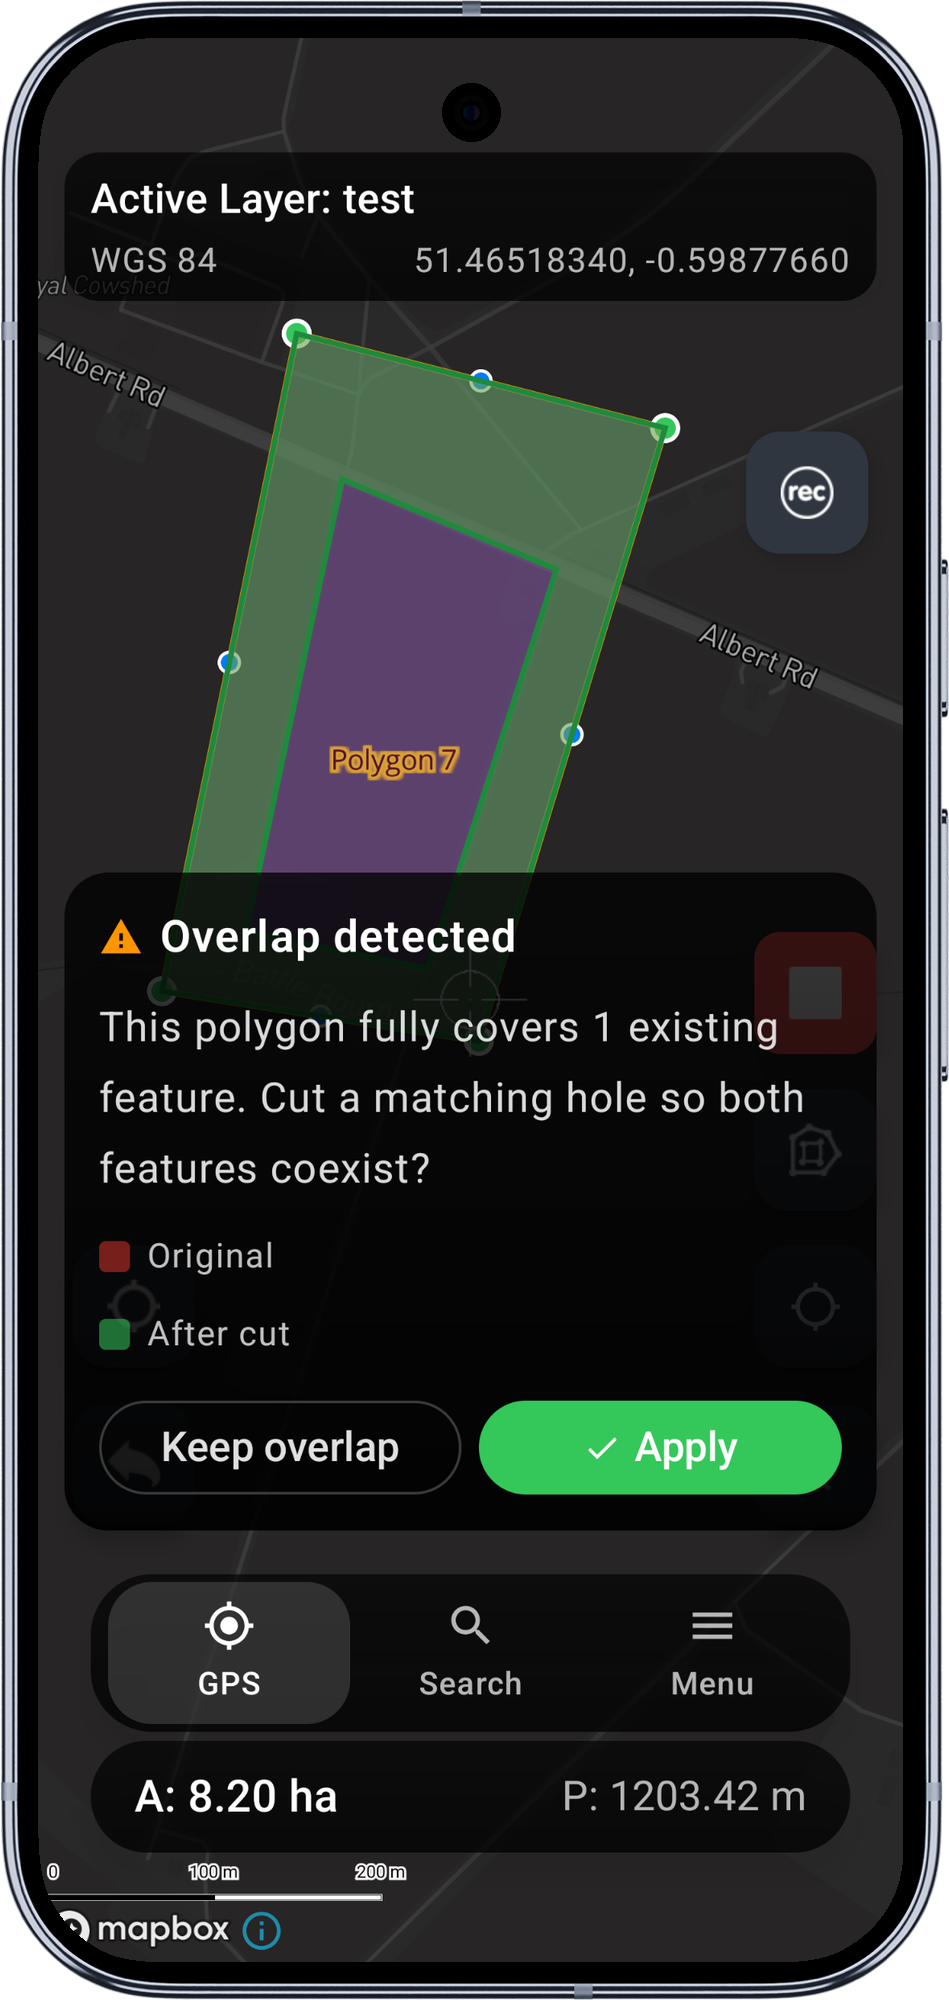
The committed feature is a donut - the outer polygon with a hole matching the enclosed feature, so both coexist without overlapping.
The Overlap detected sheet reads This polygon fully covers 1 existing feature. Cut a matching hole so both features coexist? The legend shows After cut (green). Tap Apply to commit the donut.
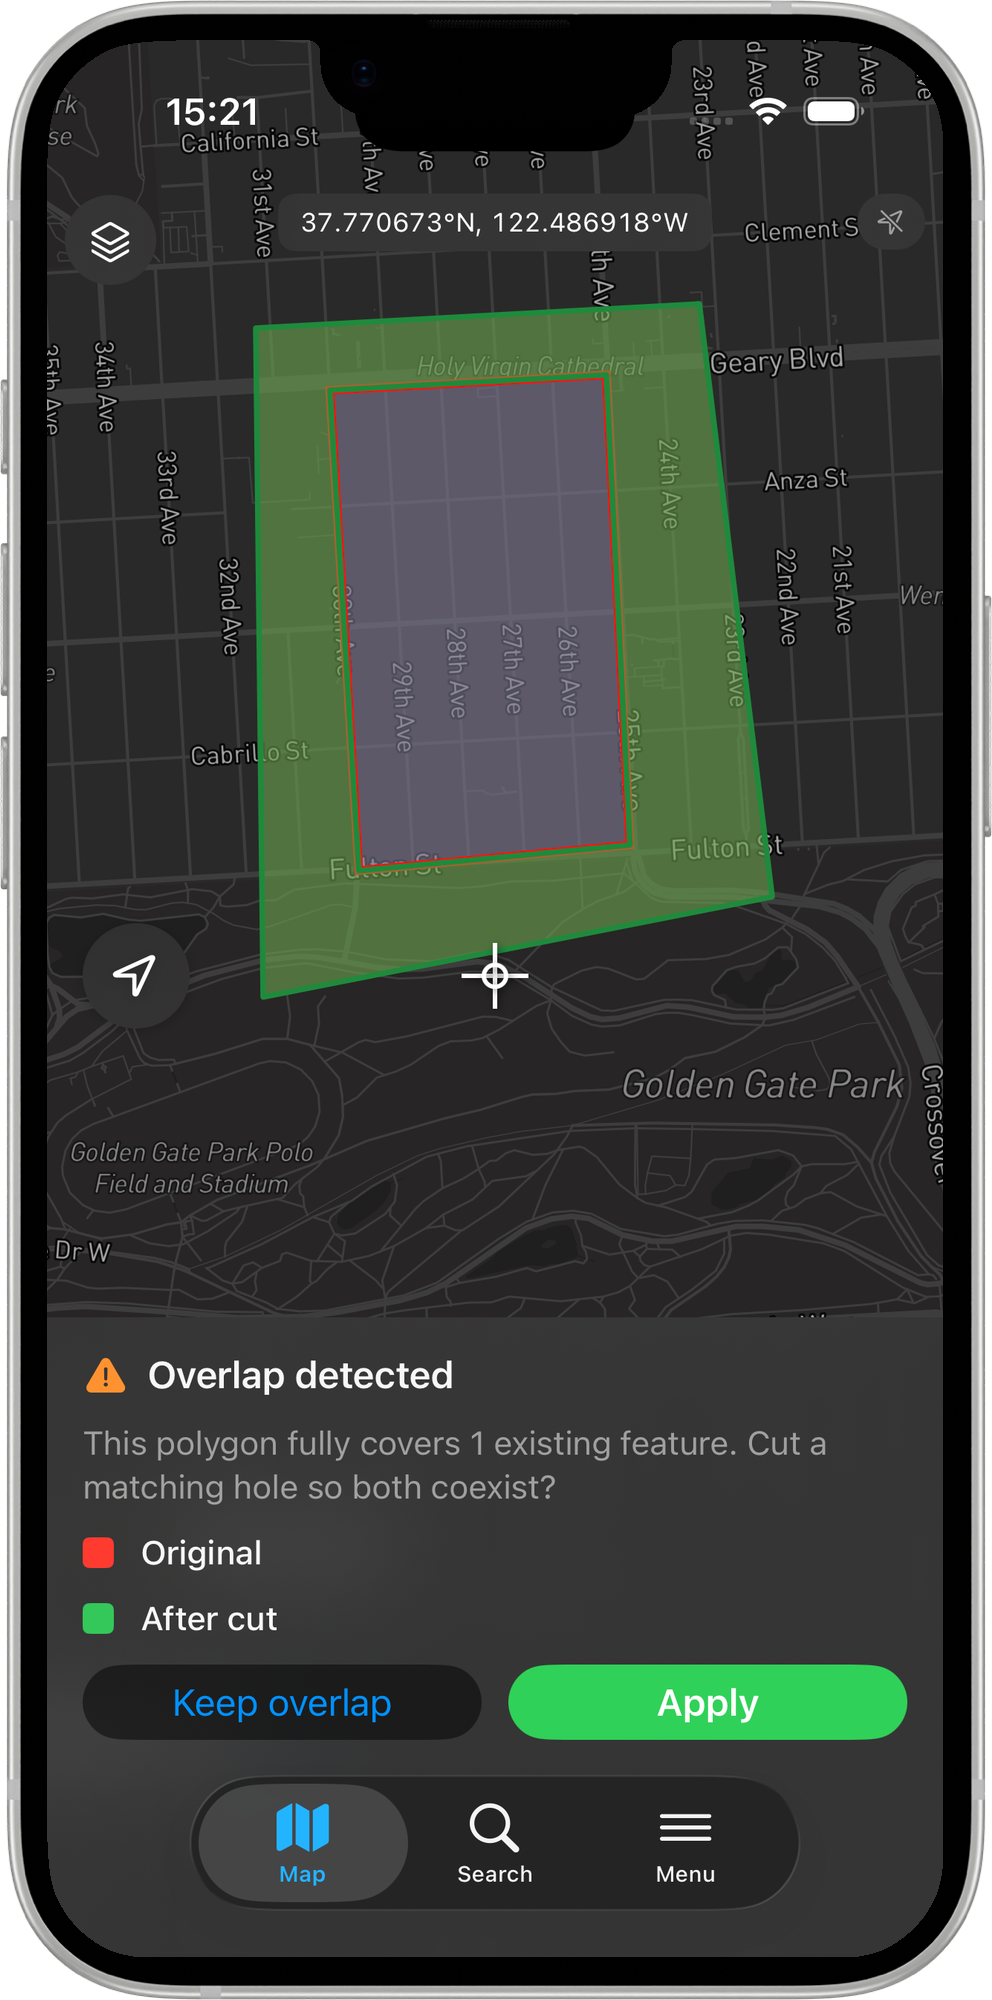
The committed feature is a polygon with an interior ring around the enclosed feature.

When the edit cannot be auto-resolved
A few geometries cannot be clipped or cut cleanly. In these cases Mapit explains why and lets you commit anyway (saving your shape as drawn, with no topology applied) so an edit is never stranded:
- Your polygon sits entirely inside a neighbour - clipping it would leave nothing.
- The clip would split your polygon into several pieces - the result is not a single polygon.
- Your polygon does not extend beyond the neighbours - there is nothing left after clipping.
- The geometry is invalid - for example a self-intersection from a GPS jump during recording. The feature is saved as-is and the check is skipped.
You can always choose Keep overlap on the preview to commit your original shape without applying the topology rule.
Tips for clean cadastral capture
- Overlap generously, then clip. Draw well past the shared boundary and let the clip find the real edge. It is faster and far more accurate than tracing.
- Flag every layer in the same fabric. If parcels and buildings must not overlap each other, flag both (up to three layers).
- Pair with Vertex Snapping. Snapping helps you start and end on existing vertices; Avoid Overlaps cleans up the boundary in between.
- All geometry is stored in WGS84 and the topology runs directly on those coordinates - there is no reprojection step to introduce error.