Advanced Editing Settings
The Advanced Editing settings category controls Mapit's Pro+ power-user editing tools. It covers three tools: Split (cut a feature into two), Buffer (generate a polygon buffer around a feature), and Merge (combine two adjacent features into one).
See the workflow articles for context: Split Operation, Buffer Tool, and Merge Tool.
- Android
- iOS
Go to Settings > Advanced Editing to access these options.
Advanced Editing requires a Mapit Pro Plus subscription. The master toggle is visible on all tiers, but turning it on without Pro+ opens the subscription paywall.
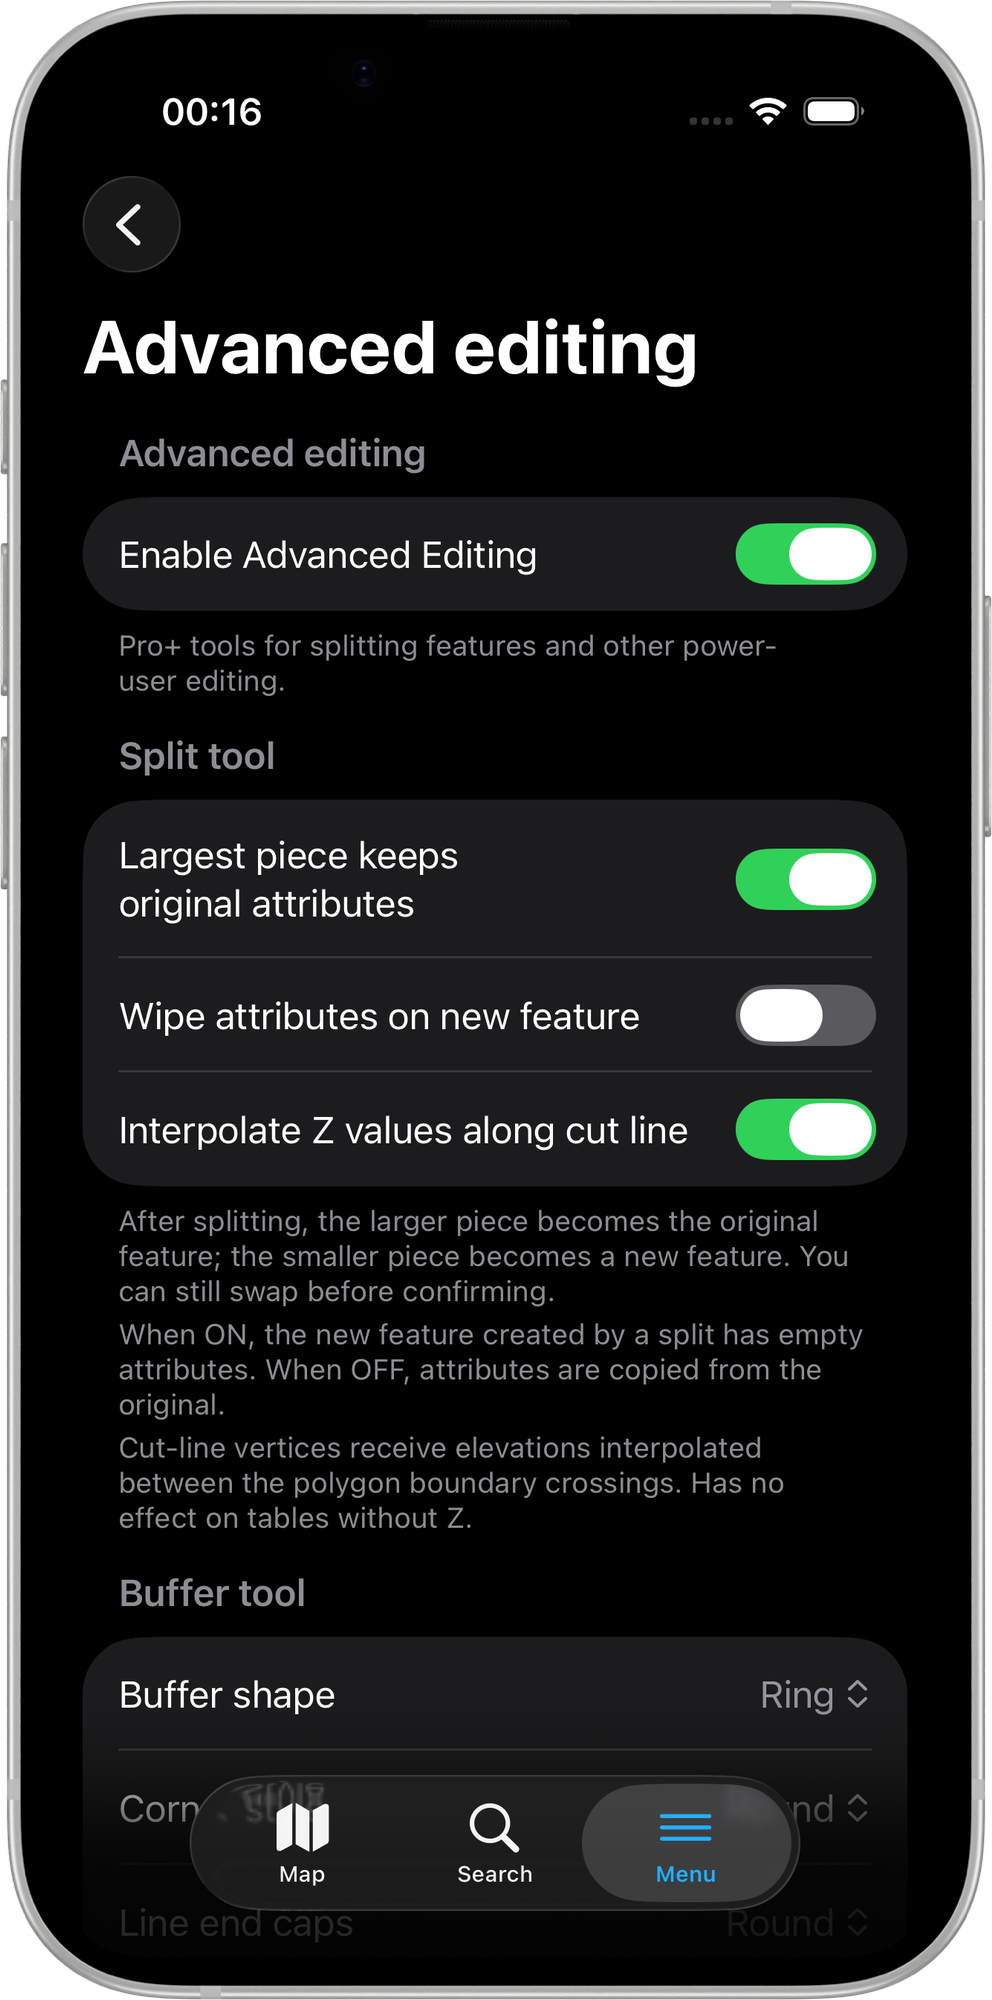
Enable Advanced Editing
Default: Off
The master switch for the Advanced Editing tools. When off, the Tools chip on the edit toolbar does not appear, and the Advanced editing tools section in the edit-coordinates dialog (for points) is hidden. Free / Pro / Pro+ users all see the same toolbar in this case - byte identical.
When on (Pro+ only), the Tools chip appears whenever you open an existing polygon or polyline feature for editing, and the dialog section appears for point features. Both surfaces lead into the editing-tools bottom sheet.
The other settings on this screen apply only when this master toggle is on. They keep their last values when the master is flipped off, so you can re-enable Advanced Editing without reconfiguring them.
Split tool
Settings under the Split tool category header configure the Split Operation.
Largest piece keeps original attributes
Default: On | Visible when: master is on
After a successful split, two pieces are produced. One keeps the original feature's row ID and attributes; the other becomes a new feature.
- On (default) - the larger piece is treated as the original. The smaller piece becomes the new feature. You can still tap the smaller piece on the map to swap before confirming.
- Off - the polygonize-output order is used as the default (essentially arbitrary). You almost always want to swap manually in this case.
The map preview after Apply colours the chosen "original" piece green and the "new feature" piece blue.
Wipe attributes on new feature
Default: Off | Visible when: master is on
Controls the attribute payload of the freshly-inserted second piece:
- Off (default) - all attributes from the original feature are copied verbatim onto the new row. The two rows now have the same attribute values, just different geometries. Useful when both halves are still "the same parcel" attribute-wise (e.g. cadastral split where both halves keep the owner attribute).
- On - the new row is inserted with blank attributes. You fill them in afterwards. Useful when the two halves are conceptually different features (e.g. forestry stands where the split represents a change of management unit).
The original row's attributes are never modified, only its geometry.
Interpolate Z values along cut line
Default: On | Visible when: master is on
Only relevant for Z-capable polygons (3D vertices). When on, vertices created along the cut line inherit Z values via linear interpolation between the two outer-ring crossing points. When off, cut-line vertices get Z = 0.
Most surveying use cases want this on for topological consistency with the source's elevations.
Buffer tool
Settings under the Buffer tool category header configure the Buffer Tool.
Buffer shape
Default: Filled | Visible when: master is on
| Value | Behaviour |
|---|---|
| Filled (full polygon) | Standard buffer polygon - source plus a margin of the chosen radius. |
| Ring (donut around the original) | The buffer polygon minus the source polygon. Just the band of area within N metres of the boundary. Polygon source + positive radius only; the slider hides negative values when this is selected. |
For point sources, shape is forced to Filled regardless of this setting (a ring around a single point is geometrically degenerate without an inner radius too).
Corner style
Default: Round | Visible when: master is on
Maps directly to JTS' join-style parameter:
| Value | Behaviour |
|---|---|
| Round (smooth) | Curved corners. Standard buffer look. |
| Mitre (sharp) | Sharp corners that extend the source's edges to a point. CAD-feel for cadastral / regular shapes (buildings, parcels). |
| Bevel (clipped) | Clipped sharp corner - the offset edges meet via a flat segment. |
The default is Round; surveyor work usually wants smooth corners. Architects and CAD users tend to prefer Mitre.
Line end caps
Default: Round | Visible when: master is on
Only relevant when buffering polylines. Maps to JTS' end-cap-style:
| Value | Behaviour |
|---|---|
| Round | Rounded semi-circular caps at each line end. Standard. |
| Flat | The buffer clips flat at the line endpoint. Useful for road centerlines buffered into a carriageway, where rounded ends look out of place. |
| Square | The buffer extends past the line end by the radius distance, with a square cap. |
Allow negative radius (shrink polygons)
Default: Off | Visible when: master is on
When on, the buffer slider exposes negative values. A negative radius shrinks a polygon inwards by that distance. Useful for stand-off zones inside a parcel ("everything more than 5 m from the boundary").
The slider gating is conservative on purpose - negative values are only shown when all of the following hold:
- This setting is on.
- The source is a polygon (negative radius is undefined for points and lines).
- The buffer shape is Filled (a shrunk ring would always be empty).
In every other combination the slider stays at the positive-only 1 to 500 m range so you are not offered values that would just be rejected.
Merge tool
Settings under the Merge tool category header configure the Merge Tool.
Largest piece keeps original attributes
Default: On | Visible when: master is on
When you confirm a merge, one row keeps its ID and attributes; the other row is deleted. This setting controls which side starts as the kept row when the preview opens.
- On (default) - the larger piece (by area for polygons, by length for polylines) is preselected as the kept side. The smaller-side row is deleted on Apply unless you swap. Most surveying workflows want this on.
- Off - the first feature (the one you started the edit session on, labelled A on the map) is preselected as the kept side regardless of size. Useful when your "starting point" is always the one you care about.
In either case, the preview card has two pills (A / B) and you can tap to swap before confirming. The kept side's label on the map renders larger with a thicker purple halo so the choice is visible at a glance.
The kept row always retains its own attribute values; the deleted row's attributes go with it.
Go to Settings > Editing > Advanced Editing to access these options.
Advanced Editing requires a Mapit Pro Plus subscription. The master toggle is visible on all tiers, but turning it on without Pro+ opens the subscription paywall.
Enable Advanced Editing
Default: Off
The master switch for the Advanced Editing tools. When off, the Tools chip on the edit toolbar does not appear, and the Buffer action in the feature info row menu (for points) is hidden. Free / Pro / Pro+ users all see the same toolbar in this case.
When on (Pro+ only), the Tools chip appears whenever you open an existing polygon or polyline feature for editing, and the Buffer menu item appears on tapped point features (provided your active layer is a polygon). Both surfaces lead into the editing-tools bottom sheet.
The other settings on this screen apply only when this master toggle is on. They keep their last values when the master is flipped off, so you can re-enable Advanced Editing without reconfiguring them.
Split tool
Settings under the Split tool category header configure the Split Operation.
Largest piece keeps original attributes
Default: On | Visible when: master is on
After a successful split, two pieces are produced. One keeps the original feature's row ID and attributes; the other becomes a new feature.
- On (default) — the larger piece is treated as the original. The smaller piece becomes the new feature. You can still tap the smaller piece on the map to swap before confirming.
- Off — the polygonize-output order is used as the default (essentially arbitrary). You almost always want to swap manually in this case.
The map preview after Apply colours the chosen "original" piece green and the "new feature" piece blue.
Wipe attributes on new feature
Default: Off | Visible when: master is on
Controls the attribute payload of the freshly-inserted second piece:
- Off (default) — all attributes from the original feature are copied verbatim onto the new row.
- On — the new row is inserted with blank attributes. You fill them in afterwards.
The original row's attributes are never modified, only its geometry.
Interpolate Z values along cut line
Default: On | Visible when: master is on
Only relevant for Z-capable polygons (3D vertices). When on, vertices created along the cut line inherit Z values via linear interpolation between the two outer-ring crossing points. When off, cut-line vertices get Z = 0.
Z interpolation along the cut line is still on the iOS roadmap — the toggle is wired up so the preference can be set now, but cut-line Z is currently always 0 on iOS regardless of this setting.
Buffer tool
Settings under the Buffer tool category header configure the Buffer Tool.
Buffer shape
Default: Filled | Visible when: master is on
| Value | Behaviour |
|---|---|
| Filled | Standard buffer polygon — source plus a margin of the chosen radius. |
| Ring | The buffer polygon minus the source polygon. Just the band of area within N metres of the boundary. Polygon source + positive radius only; the slider hides negative values when this is selected. |
For point sources, shape is forced to Filled regardless of this setting (a ring around a single point is geometrically degenerate without an inner radius too).
Corner style
Default: Round | Visible when: master is on
Maps directly to the GEOS join-style parameter:
| Value | Behaviour |
|---|---|
| Round | Curved corners. Standard buffer look. |
| Mitre | Sharp corners that extend the source's edges to a point. CAD-feel for cadastral / regular shapes. |
| Bevel | Clipped sharp corner — the offset edges meet via a flat segment. |
Line end caps
Default: Round | Visible when: master is on
Only relevant when buffering polylines. Maps to the GEOS end-cap-style:
| Value | Behaviour |
|---|---|
| Round | Rounded semi-circular caps at each line end. |
| Flat | The buffer clips flat at the line endpoint. Useful for road centerlines buffered into a carriageway. |
| Square | The buffer extends past the line end by the radius distance, with a square cap. |
Allow negative radius
Default: Off | Visible when: master is on
When on, the buffer slider exposes negative values. A negative radius shrinks a polygon inwards by that distance. Useful for stand-off zones inside a parcel ("everything more than 5 m from the boundary").
The slider gating is conservative on purpose — negative values are only shown when all of the following hold:
- This setting is on.
- The source is a polygon (negative radius is undefined for points and lines).
- The buffer shape is Filled (a shrunk ring would always be empty).
In every other combination the slider stays at the positive-only range so you are not offered values that would just be rejected.
Maximum radius
Default: 500 m | Range: 100 m – 10 000 m | Step: 50 m | Visible when: master is on
Caps the upper bound of the Buffer toolbar slider. The slider runs 1 m – max for the standard case and ±max when shrinking is unlocked (see Allow negative radius above).
Increase for wider stand-off zones (utility corridors, 1 km – 5 km buffers). Decrease to keep edits precise so a stray slider drag does not produce a wildly oversized polygon.
Changes take effect on the next time you open the Buffer toolbar — no app restart needed.
This setting is iOS-only for now. The Android equivalent is tracked on the Android roadmap so the two platforms will eventually be at parity here too.
Merge tool
Settings under the Merge tool category header configure the Merge Tool.
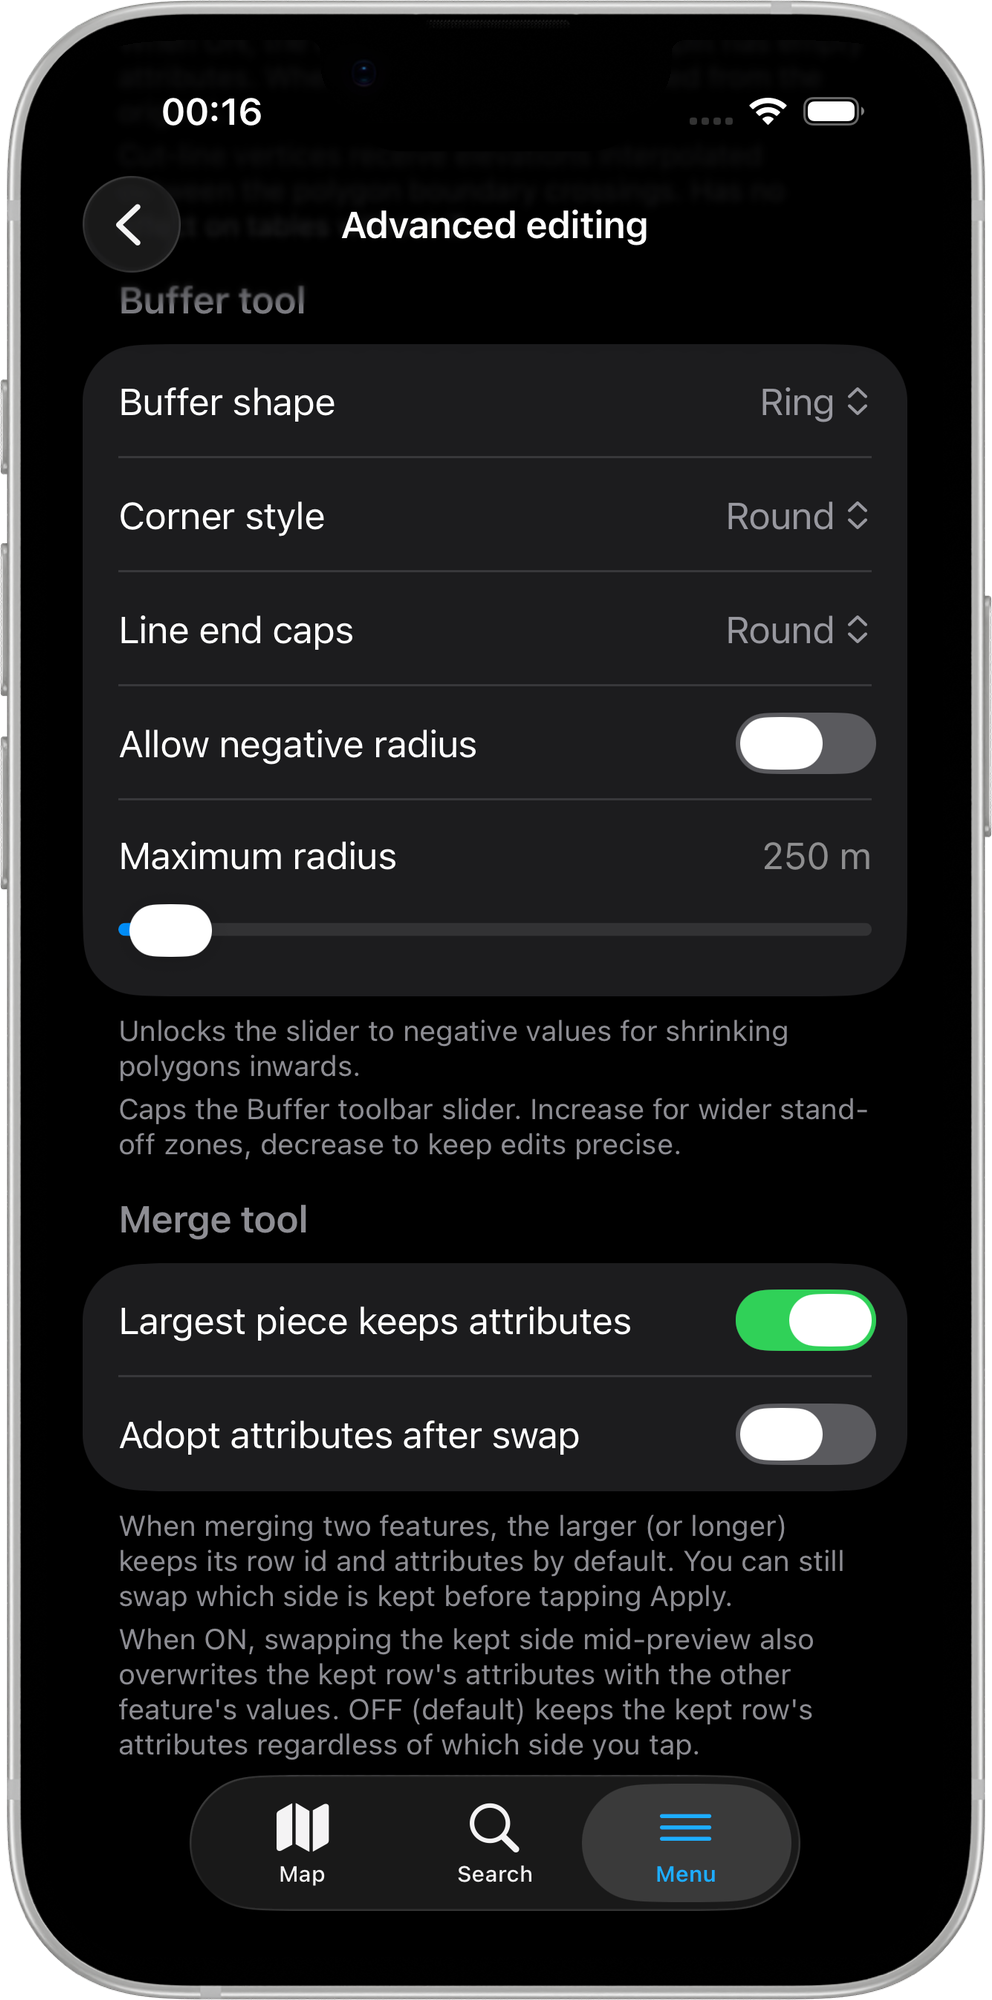
Largest piece keeps attributes
Default: On | Visible when: master is on
When you confirm a merge, one row keeps its ID and attributes; the other row is deleted. This setting controls which side starts as the kept row when the preview opens.
- On (default) — the larger piece (by area for polygons, by length for polylines) is pre-selected as the kept side. The smaller-side row is deleted on Apply unless you swap.
- Off — Feature A (the feature you opened for editing, labelled A on the map) is always pre-selected as the kept side regardless of size. Useful when your starting point is always the one you care about.
In either case you can tap the Feature B tag on the confirmation card to swap before confirming. The kept side's label on the map renders larger with a thicker purple halo so the current choice is clearly visible.
Adopt attributes after swap
Default: Off | Visible when: master is on
Controls what happens to attribute values when you tap Feature B to swap the kept side mid-preview.
- Off (default) — swapping changes which row's ID survives but the kept row always retains its own attribute values. The merge feels like a geometry-only change: the surviving row ends up with its original attributes regardless of which side you chose.
- On — swapping also overwrites the kept row's attribute values with the other feature's attribute values. Use this when you want the attributes from the feature you tapped second (Feature B) to survive, not just its geometry.
The setting has no effect when you accept the default side (no swap). It only triggers if you explicitly tap to swap during the preview.
Related Topics
- Split Operation - Cut a feature into two by drawing a line across it.
- Buffer Tool - Generate a buffer polygon around a feature.
- Merge Tool - Combine two adjacent features on the same layer into one.
- Snapping Settings - The other Pro+ editing-time category.
- Mapit Pro Plus - What is included in the Pro+ subscription.