Vertex Snapping
Vertex Snapping makes your digitising topologically clean. When you are adding or dragging a vertex near an existing feature, Mapit pulls the vertex exactly onto the nearest vertex or edge within a configurable radius - no more hairline gaps between adjacent polygons and no more duplicate near-identical coordinates where two lines meet.
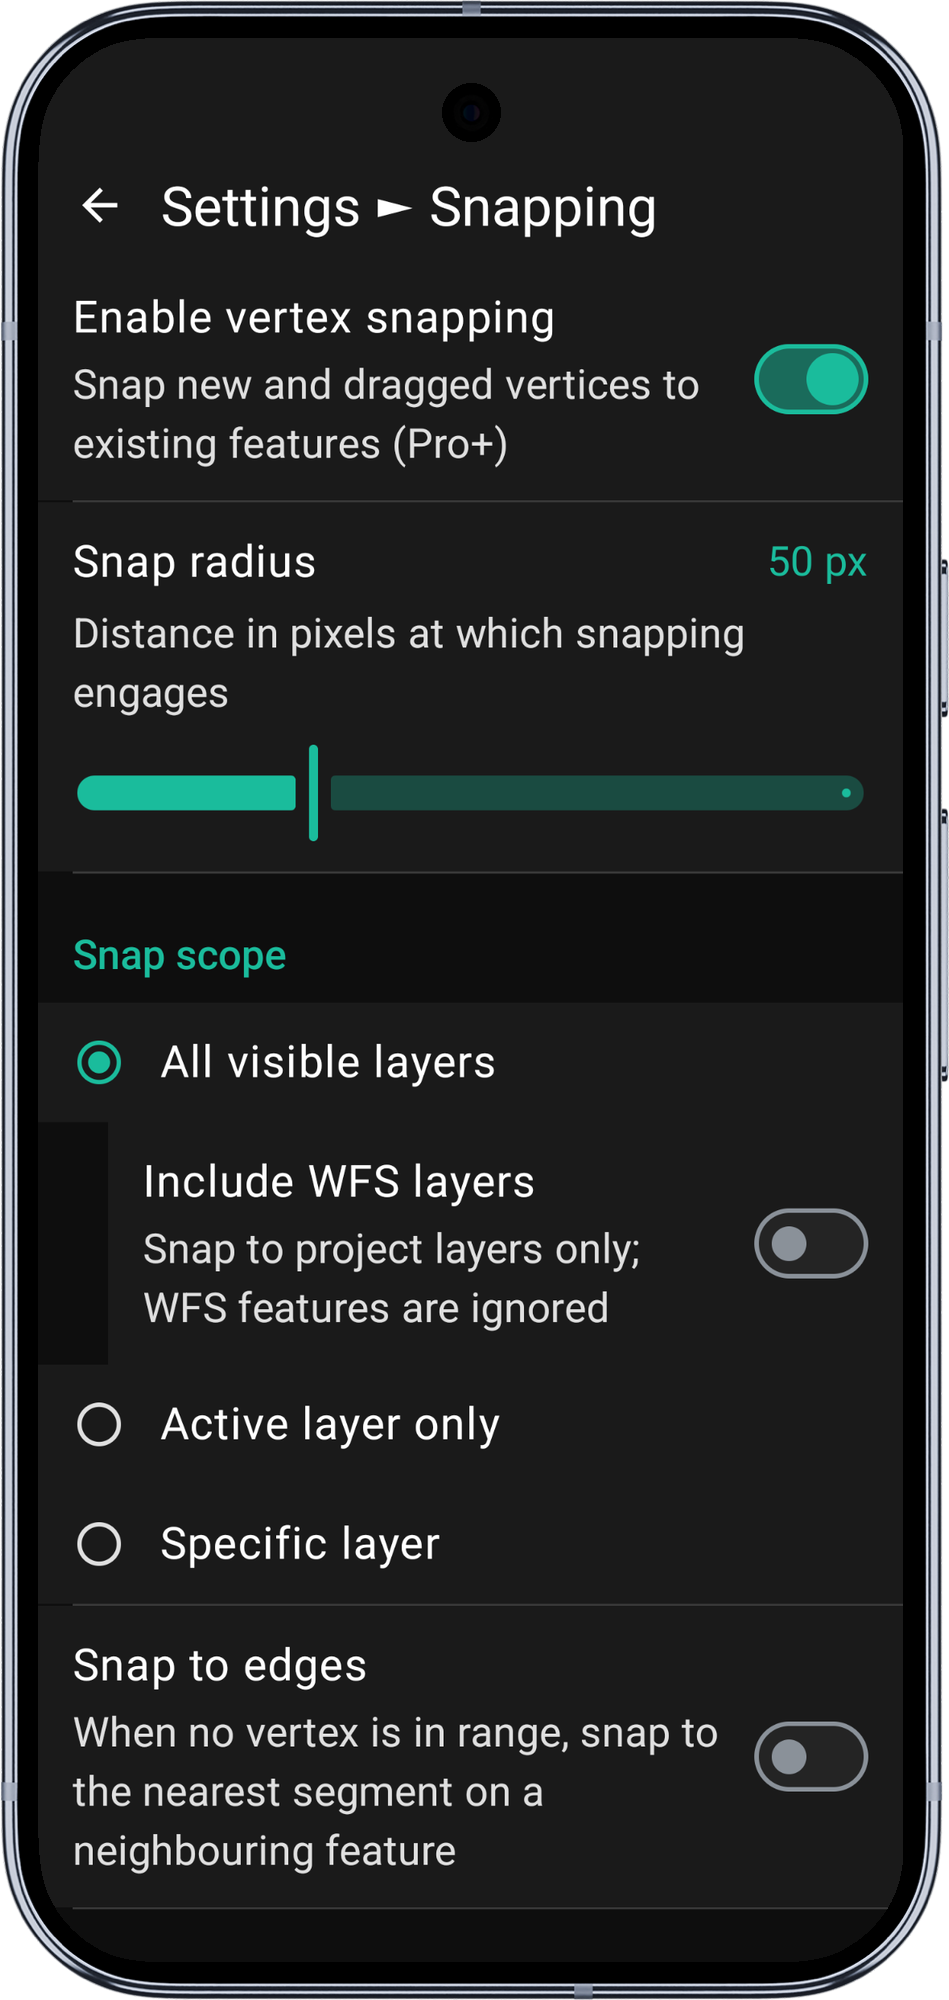
Vertex Snapping is included in Mapit Pro Plus on both Android and iOS. Free and Pro users can see the master toggle in Settings, but turning it on opens the subscription paywall.
- Android
- iOS
What gets snapped
When snapping is enabled and a vertex is within the snap radius of a candidate, Mapit uses the candidate's coordinates instead of the raw input coordinates.
Two kinds of snap are supported:
| Target | When it applies |
|---|---|
| Vertex snap | The input point is within the snap radius of a rendered vertex on a nearby feature |
| Edge snap | No vertex is within range, but a nearby feature has an edge segment within range. The vertex is placed on the nearest point of that segment |
Edge snap is a fall-back that only engages after vertex snap has failed for the current tap or drag. It is controlled by a separate toggle under Snapping Settings because some workflows want only vertex-to-vertex coincidence.
- Android
- iOS
Where snapping works
All three vertex input modes respect snapping:
- Tap on the map - a tap within the snap radius of a target snaps the new vertex onto it. A brief orange circle confirms the snap landed on an existing coordinate and not at the raw tap position.
- Crosshair, GPS unlocked - as you pan the map, an orange indicator appears on nearby snap targets. Tap Add vertex and the vertex is placed on the indicated target rather than at the map centre.
- Vertex drag - during a drag, the vertex follows your finger, but the committed position on release is the snap target if one is in range. A circular loupe floats above your finger to show what is nearby (see below).
Snapping is deliberately not active in the Crosshair mode when the map is locked to GPS. A GPS-driven vertex should reflect your actual measured position, not be quietly pulled onto a nearby feature.
The snap indicator
When a target is within range, Mapit draws a filled orange circle on that coordinate. This is the coordinate that will be used if you commit the vertex now.
- In tap mode, the indicator flashes for about 600 ms after a successful snap, confirming the tap has landed on the existing coordinate.
- In crosshair mode, the indicator stays on while the map is settled and a target is in range. It clears as soon as you commit the vertex.
- During a drag, the indicator stays visible for as long as you are within range of a target.
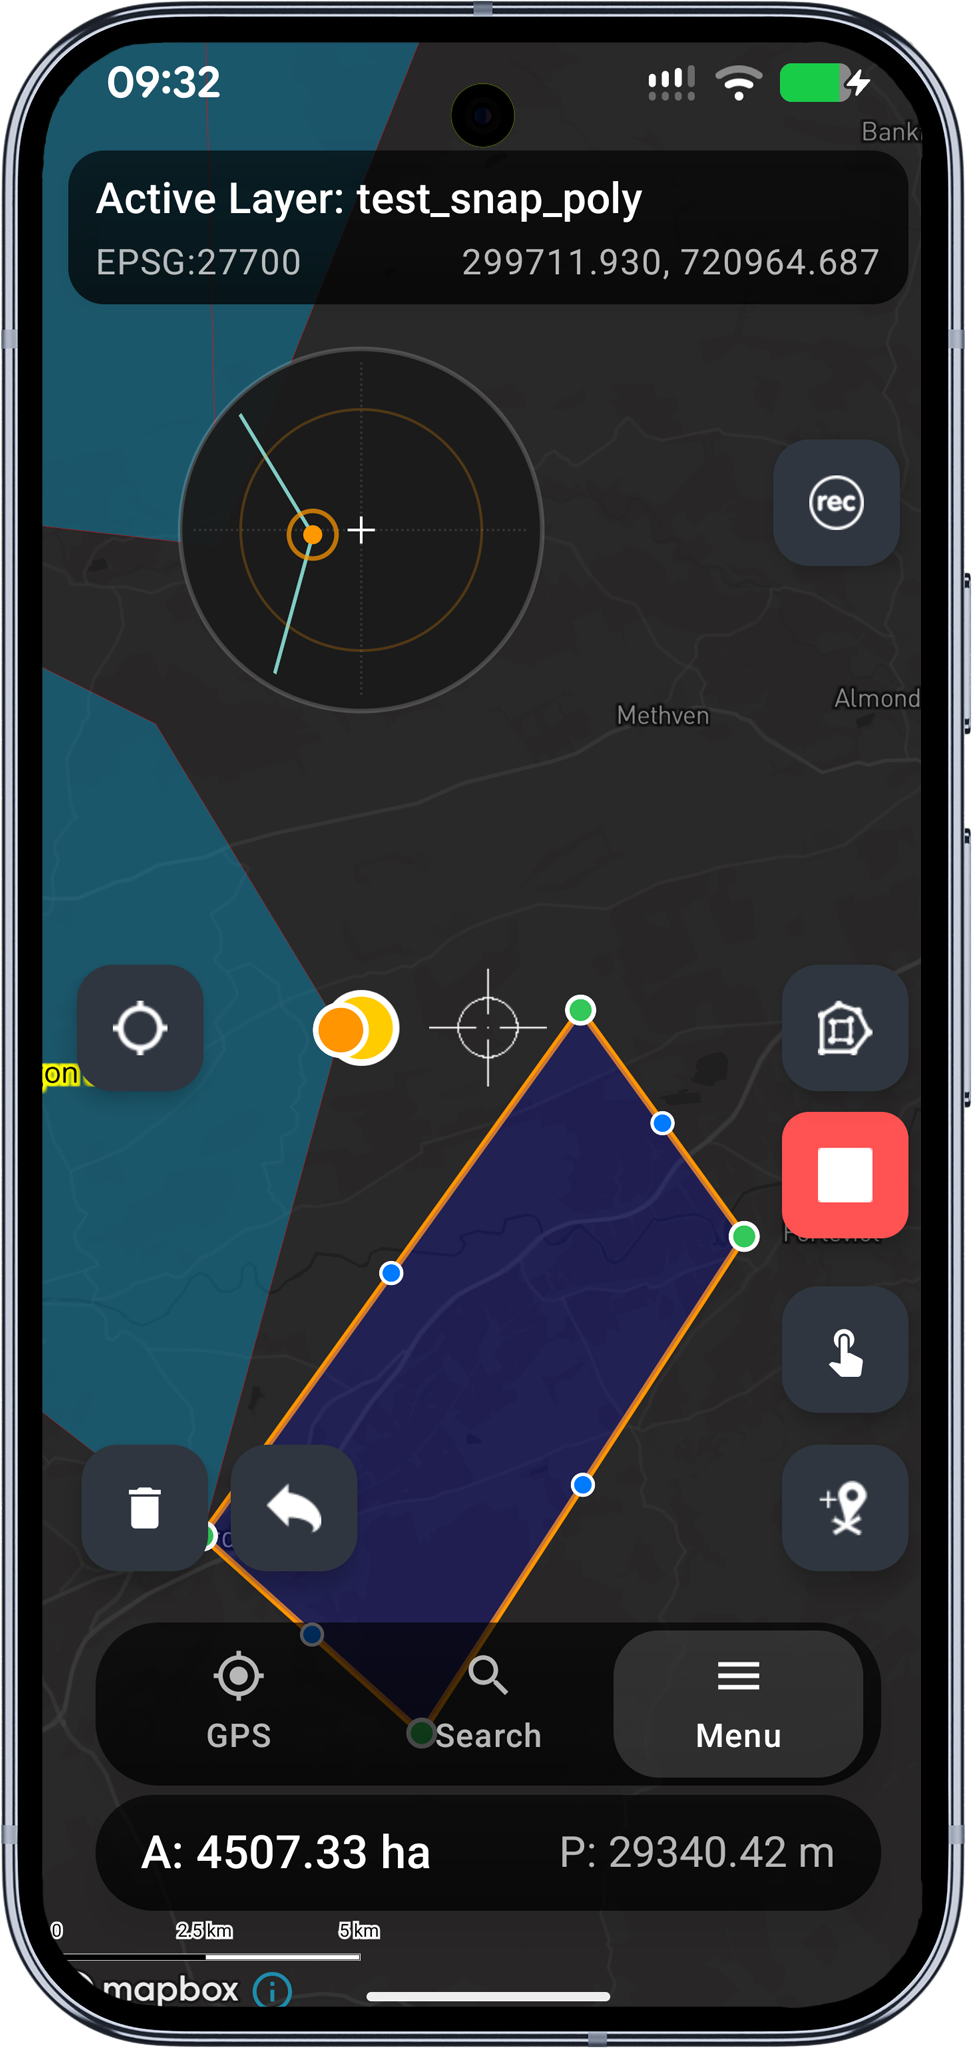
The drag loupe
When you drag a vertex with snapping enabled, a circular magnifying loupe floats above your finger. It shows:
- Nearby feature edges and vertices from your snap scope.
- In-progress session vertices from the feature you are currently editing, so you can snap the last vertex of a ring onto the first for a clean closure.
- A pulsing orange reach ring sized to the snap radius, so you can see exactly when you cross into snap distance.
- The snap target indicator when a candidate is in range.
The loupe only appears when there is something to snap to, so it does not clutter the screen during drags in open space. Edges are clipped to the loupe boundary so they do not leak in from far-off polygon corners.
- Android
- iOS
Ring closure and self-snap
Whenever an edit session is active, the vertices you have already added are automatically included as snap candidates - including the first vertex of the in-progress geometry. This means closing a polygon ring cleanly is as simple as snapping the final vertex onto the first one.
Self-snap is always on; there is no setting to disable it. The vertex you are currently dragging is excluded from the candidates so it cannot snap to itself.
Z-value inheritance
If the active layer is Z-capable and the snap target has a Z value, the new or dragged vertex inherits that Z value. This keeps elevations consistent across shared vertices between 3D features.
When the target is a flat 2D feature, the Z value for the new vertex is computed from the active layer's height rules (GPS altitude, antenna height, geoid model) as normal.
Precision
Features on the map are rendered from Mapbox vector tiles, which quantise coordinates at lower zooms (roughly 5 metres at zoom 10). Mapit ignores the rendered geometry when snapping and reads the exact coordinates from the underlying GeoPackage, so a snapped vertex matches the target to full double precision regardless of how zoomed-out you are when you tap or drag.
Snap scope
The Snap scope setting controls which layers contribute snap candidates. Three options are available:
- All visible layers - any rendered feature on the map can be a target. The default; usually what you want for cross-layer topological cleanup. A nested Include WFS layers switch refines this further - turn it off when you have a busy WFS reference background (cadastral overlays, basemap WFS feeds) and only want to snap to your own GeoPackage features.
- Active layer only - snapping is restricted to the layer you are currently editing. WFS layers can never be the active layer (they are read-only), so this option always excludes WFS noise.
- Specific layer - snapping is restricted to a single layer of your choice (a GeoPackage table or a WFS layer). Pick the layer from the dropdown that appears once this option is selected. If the chosen layer is later hidden, snapping silently falls back to All visible layers until you re-show it.
Cluster markers and session overlays (vertex and midpoint layers) are excluded automatically and cannot be snap targets.
See Snapping Settings - Snap scope for the full reference, including the WFS toggle and the specific-layer fallback rules.
Typical workflows
Splitting a shared boundary
- Digitise the first polygon normally.
- Start a new polygon on the same layer with the Tap on the map mode.
- Tap on each shared corner of the first polygon. Each tap snaps exactly on the existing vertex, giving you identical coordinates.
- Close the ring by tapping the first vertex again - ring closure self-snap keeps the coordinates exact.
Extending a network of lines
- Open an edit session on the line layer.
- Switch to Tap on the map mode.
- Tap the end vertex of an existing line to start a new one from that exact coordinate.
- Continue tapping to build up the new line.
Fine-tuning an existing geometry
- Tap an existing feature to open it for editing.
- Drag a vertex; watch the loupe to see which nearby edges or vertices are within range.
- Release the vertex when the snap indicator is on the target you want. The vertex commits to the target coordinate, not to the raw finger position.
Requirements
- A Mapit Pro Plus subscription.
- Snapping master toggle enabled in Settings > Snapping.
Without Pro+, the master toggle stays off and the paywall opens the moment you try to switch it on. If your Pro+ subscription expires, snapping disengages automatically.
What gets snapped
When snapping is enabled and a vertex lands within the snap radius of a candidate, Mapit uses the candidate's coordinates instead of the raw input coordinates.
Two kinds of snap are supported:
| Target | When it applies |
|---|---|
| Vertex snap | The input point is within the snap radius of a rendered vertex on a nearby feature |
| Edge snap | No vertex is within range, but a nearby segment is. The vertex is placed on the nearest point of that segment. Off by default; enabled from Snapping Settings. |
Edge snap only engages after vertex snap has failed for the current tap or drag. A vertex match always wins over an edge match.
- Android
- iOS
Where snapping works
Both vertex input modes respect snapping:
- Tap on the map — a tap within the snap radius of a target snaps the new vertex onto it. A pulsing orange dot on the map marks the snap target before you lift your finger; on release the vertex commits to that coordinate.
- Vertex drag — during a drag, the committed position on release is the snap target if one is in range. The drag handle visually springs to the snap target. A circular loupe floats above your finger to show what is nearby (see below).
Snapping is deliberately not active in Crosshair mode when the map is locked to GPS. A GPS-driven vertex should reflect your actual measured position, not be pulled onto a nearby feature.
The snap indicator
When a target is within range, Mapit draws a pulsing orange dot on that coordinate. This is the coordinate that will be used if you commit the vertex.
- In tap mode, the orange dot appears as you hover near a candidate before you lift your finger.
- During a drag, the dot stays visible while you are within range and the drag handle springs toward the target.
The drag loupe (magnifier)
When you drag a vertex with snapping enabled, a circular magnifying loupe floats above your finger. It shows:
- Nearby feature edges and vertices from your snap scope.
- In-progress session vertices — snap the final polygon vertex onto the first for a clean ring closure.
- A pulsing orange reach ring sized to the snap radius, so you can see exactly when you enter snap distance.
- A bold orange snap target marker when a candidate is in range.
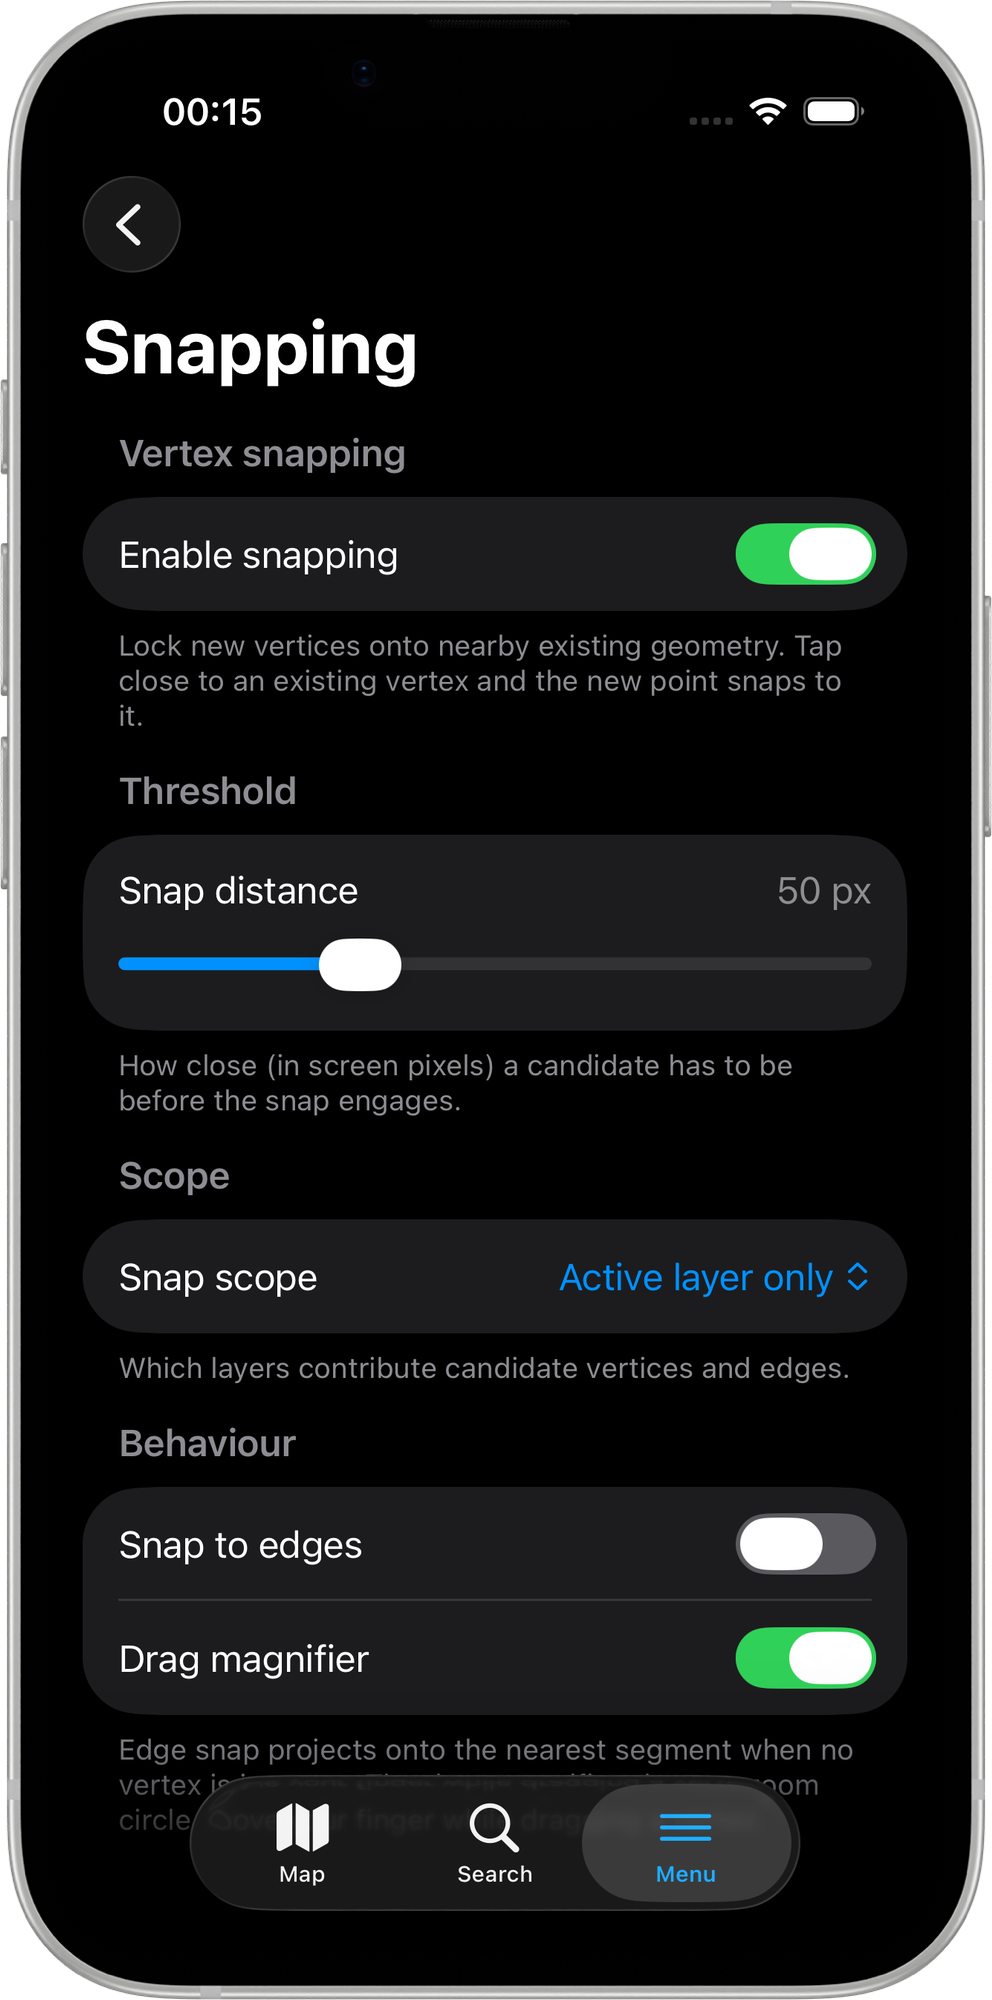
The loupe is toggleable: go to Settings → Editing → Snapping → Drag magnifier to turn it on or off. It is enabled by default for Pro+ users.
- Android
- iOS
Ring closure and self-snap
Whenever an edit session is active, the vertices you have already added are automatically included as snap candidates — including the first vertex of the in-progress geometry. This makes closing a polygon ring as simple as snapping the final vertex onto the first one.
Self-snap is always on. The vertex you are currently dragging is excluded from the candidates so it cannot snap to itself.
Snap scope
The Snap scope setting controls which layers contribute snap candidates:
- All visible layers — any rendered GeoPackage feature on the map can be a target. The default for cross-layer topological cleanup.
- Active layer only — snapping is restricted to the layer you are currently editing.
See Snapping Settings for the full reference.
Precision
Mapit reads exact coordinates from the underlying GeoPackage rather than from rendered tile geometry, so a snapped vertex matches the target to full double precision regardless of zoom level.
Typical workflows
Splitting a shared boundary
- Digitise the first polygon normally.
- Start a new polygon on the same layer with Tap on the map mode.
- Tap on each shared corner of the first polygon — each tap snaps exactly onto the existing vertex, giving you identical coordinates.
- Close the ring by tapping the first vertex again; self-snap keeps the coordinates exact.
Extending a network of lines
- Open an edit session on the line layer.
- Switch to Tap on the map mode.
- Tap the end vertex of an existing line to start a new one from that exact coordinate.
- Continue tapping to build up the new line.
Fine-tuning an existing geometry
- Tap an existing feature to open it for editing.
- Drag a vertex; watch the loupe to see which nearby edges or vertices are within range.
- Release the vertex when the snap indicator is on the target you want. The vertex commits to the target coordinate, not to the raw finger position.
Requirements
- A Mapit Pro Plus subscription (iOS — App Store).
- Snapping master toggle enabled in Settings → Editing → Snapping.
Free and Pro users see the Snapping row in Settings, but tapping the master toggle opens the Pro+ subscription paywall. If your Pro+ subscription expires, snapping disengages automatically.
Related Topics
- Vertex Input Modes - The three ways to add a new vertex
- Snapping Settings - Full reference for every snapping option
- Mapit Pro Plus - What is included in the Pro+ subscription